Wednesday, January 25, 2023

Failure Still a Sweet Success.

When it comes to perfection, I am far from it, and proud of my quirks.  They make me unique, the square peg that does not fit into the round hole, and most of all, a character.  Enjoyment comes from attempting new things; little adventures that make life very interesting.  When it comes to cooking and baking, there are so many adventures that do not always end up as planned.

Take, for example, an attempt at making chocolate lava cakes.  You know, those little round chocolate cakes, that when broken open with a fork, liquid chocolate oozes out.   While downsizing older cooking magazines, I found a recipe, from Ghirardelli, for their Individual Chocolate Lava Cakes and decided to try it out.  All the ingredients were in the well-stocked pantry; but only needed to purchase another set of custard cups (safe for oven use) as I only had a set of 4 and the recipe made 6 cakes.

Now mind you, I am still not a big fan of baking from scratch; all that measuring and calculating, but I was up for giving it a go.  It was chocolate, so how wrong could that be, right? I followed the directions, made the chocolate that would go in the center of the cake and waited the two hours recommended. Then it was time to make the batter and assemble in the cups; easy peasy. Only problem is that, even tempering in the oven, beforehand, my metal tray decided to warp, so the cups could not sit on it properly.  I ended up balancing the cups on the oven's metal rack; the oval cups had no problem; the round ones kept me on my toes to make sure they stayed up straight.


After baking the required 15 minutes, the cups were moved to a rack on the counter for 5 minutes of cooling. I could see the cakes begin pulling from the sides of the cups as they cooled, so was happy no knife was required to help remove them. Inverting one cup over a dessert plate, the cake easily came out.  The chocolate smell was incredible!!!


Slowly slicing open the single cake, expecting to see molten chocolate ooze out; and what did I see? Cake; super moist, decadently rich cake, but no melted chocolate center! The melted chocolate had been absorbed into the cake batter as it baked and gave me...cake!


Maybe it was just this one, so I tried another only to find the same result. To the computer I ran to read up on molten lava cakes; some recipes had higher temperatures and less bake time; some had higher temperatures with more baking time. Many recipes incorporated the melted chocolate into the batter and baked them at the same temperature and timing as I had done. Cooking forums were a little more helpful than straight recipes; the conclusion was to use the same temperature, but lower the baking time to 10 minutes instead of 15. Ovens are all different and I guess mine baked quicker which resulted in the chocolate ball melting and then being absorbed into the batter.


So alas, my hubby and I had to bite the cake bullet with a whipped cream topping and sliced strawberry. Oh, the agony of defeat never tasted so deliciously sweet.


...and here is the recipe and directions from Ghirardelli:

Individual Chocolate Lava Cakes

Ingredients:

1 and 1/2 60% Cacao Bittersweet Chocolate Baking Bars

2 eggs

1/4 cup heavy cream

8 tablespoons (1 stick) unsalted butter

2 egg yolks

1/3 cup sugar

1/2 teaspoon vanilla extract

1/4 cup cake flour

Directions:

To make centers, melt 2 ounces of chocolate (1/2 a baking bar) and cream in double boiler. Whisk gently to blend. Refrigerate about 2 hours or until firm. Form into 6 balls; refrigerate until needed.

To make cake, heat oven to 400°F. Spray six 4-ounce ramekins or custard cups with cooking spray. Melt 4 ounces of chocolate (1 baking bar) and butter in double boiler; whisk gently to blend. With an electric mixer, whisk eggs, yolks, sugar, and vanilla on high speed about 5 minutes or until thick and light. Fold melted chocolate mixture and flour into egg mixture just until combined. Spoon cake batter into ramekins. Place a chocolate ball in the middle of each ramekin.

Bake about 15 minutes or until cake is firm to the touch (remember, with my attempt, the baking time should have been 10 minutes maximum). Let it sit out of the oven for about 5 minutes. Run a small, sharp knife around inside of each ramekin, place a plate on top, invert and remove ramekin. Garnish with raspberries and a dollop of whipped cream.

Makes 6.

Note:  Do NOT use baking chips for this recipe.  They are manufactured to resist melting quickly, so their shape and consistency will be maintained in cookies and dessert breads.

Valentine’s Day is just around the corner, maybe homemade chocolate lava cakes for yourself, and your sweet hunny, whomever it is?

Mary Cokenour


Wednesday, January 18, 2023

The Rabbit Proclaims Luck for the New Year.

January 22, 2023 to February 9, 2024 is the calendar year of the rabbit, according to the Chinese zodiac.  The rabbit is the fourth, in the twelve-year cycle of animals, that appears in the Chinese zodiac, and is an earth symbol.  

In the origin story of the zodiac, Rabbit was proud and arrogant about his speed. He was neighbors with Ox and always made fun of how slow Ox was. One day, the Jade Emperor said the zodiac order would be decided by which animals could cross the river, and arrive at his party. Rabbit set off at daybreak, but when he got to the river, no other animals were in sight.  Instead of going across, in his arrogance, he thought he would be thought of as first in line, just for showing up.  So, he laid down and took a nap.  However, when he woke up, three other animals had already crossed over to arrive at the party on time, and one of them was the Ox that he had always looked down upon.  How did Rabbit get across the river anyway?   He hopped along stepping stones, slipped and fell into the water, but was able to grab onto a floating log.  Dragon was flying overhead, took pity upon Rabbit, and blew air from his nose to help push the log across to the shore.  Rabbit came in fourth place, while Dragon came in fifth, due to his being so helpful to Rabbit.

Foods served for the New Year include longevity noodles for long life, a whole steamed fish for abundance, sticky rice balls for togetherness, and pork dumplings for good fortune.  While they are commonly known as dumplings in most Asian nations, other versions are Japanese gyoza or Korean mandoo.

In America, they are known as potstickers as that is exactly what they tend to do.  Potstickers are pan fried on the bottom and then steamed.  When they are served, the browned pan-fried side is shown.  Jiaozi is the Mandarin version; the dough is thicker than for a wonton and the dumpling itself is usually boiled and pan fried.  Gow Gee is the Cantonese version; wonton wrappers are frequently used, they can either be steamed or deep fried; no boiling involved.

The Chinese dumpling dates back to 200 B.C. to the fable of Pan Gu who ends the chaotic state of the world by separating it into two "half egg" shaped parts; the sky and the earth.  They are a staple for many Chinese celebrations, and express best wishes for happy days and good health.  It was not unusual for a trinket (coins or jewels) of some value to be hidden in a few dumplings; very similar to the prizes in the English Christmas pudding.

While making the dough for dumplings is not difficult, premade wrappers can be found in the fresh produce section at supermarkets.  Also available are wonton skins, or spring and eggroll wrappers.  Not up to making the dough, or even purchasing packaged wrappers; check the frozen food section for premade dumplings, follow the package directions, and enjoy the Chinese New Year!

Chinese Dumpling Dough

Ingredients:

2 cups flour

2/3 cup warm water

Preparation:

Combine the flour and water until a soft dough forms; knead on a floured surface for five minutes.  Cover with a clean linen towel and let rest for 30 minutes.  Divide the dough in half, roll out each half into a 12-inch-long cylinder; cut into 1/2-inch slices.  Flatten out each slice with the palm of your hand, or use a rolling pin, to a 2 and 1/2-inch diameter.

Makes 48 dumpling wrappers.

The filling for dumplings is very versatile and can contain any kind of protein, vegetable or combinations; using fruit will give you the filling for a unique dessert item.   

Chinese Dumpling Filling

Ingredients:

1/2-pound ground pork

2 large napa cabbage leaves, rinsed and finely diced

2 green onions, finely sliced

1 Tbsp. minced ginger

1 Tbsp. minced garlic

2 Tbsp. soy sauce

2 Tbsp. sesame oil

2 Tbsp. cornstarch

Bowl of warm water

Preparation:

Mix all ingredients listed, except water, together; place a teaspoon of mixture off center in a dough circle.  Dip finger in water and trace around outside edge of dough circle; fold dough over filling, with edges meeting and begin pleating the edges to seal filling in.


To Fry Dumplings:


In a large skillet, heat 1/4 of canola or peanut oil over medium-high heat, add dumplings, 12 at a time, and brown one side; takes about 2-3 minutes.  Add a 1/2 cup of water, cover and let steam for 5 minutes; uncover and let cook for another 2 minutes.


To Steam Dumplings:


Fill a large stockpot halfway with water and bring to a boil.  Line bottom of bamboo steamer with cabbage leaves, place dumplings within, cover and place steamer on top of stock pot.  Steam for 6 minutes.


To Boil Dumplings:

Fill a large stockpot halfway with water and bring to a boil.  Put dumplings into boiling water and when they float, they are done.

Serve dumplings with your favorite sauce(s).


With the boil method, you can make a delicious soup by cooking the dumplings in a vegetable broth, and adding vegetables such as sugar snap peas, red bell pepper strips, and Bok choy, plus soy sauce and ground ginger.  Serve with a crispy egg roll as a side, and that is one delicious meal!

Mary Cokenour


Wednesday, January 11, 2023

Do Not Over Think the Comfort.

For New Year’s, most of San Juan County was hit by snow storms, dumping much needed moisture in the mountains, and in and around the towns.  This is definitely a blessing!  However, it did make travel difficult, so those truckers delivering goods for the stores, and packages from Amazon, were not thinking themselves blessed.  But that is balance, a pro for a con, and proof that not everyone can be made happy at the exact same time.

All right then, during 2022, I wrote several articles on preserving basic foods, sustainability, and not having the delusion that all will always be available.  Therefore, if readers paid attention, the days locked inside the home, during the storms, should not have been hardship.  Then again, 2020 through 2022, should have been teaching the same notion of making sure to be stocked up, in case of emergency.

Deep breath, let’s put aside the feeling of being overwhelmed, and embrace the healing ideal of comfort.  With food, wanting something to eat, that gives a warm, comforting feeling, could either be simplistic or complicated. Depends on what you believe is a comfort food; while someone believes it is mashed potatoes with butter, someone else is looking for baby new potatoes topped with creme fraiche and caviar.  The one thing that needs to be remembered is that you should be just as comfortable making the dish as you are eating it.

A cuisine that embodies comfort is Italian. Italian food wraps itself around you like a blanket; while the pasta is your pillow, the sauce massages the aches and pains from the body.  Sounds nice?  Funny though how many folks I have met who are scared to death to make Italian recipes.  "It's too complicated or difficult.", "I'll never find all the ingredients I'll need", "How do I know I'm doing it right if I've never tasted it before?"   Answer to all three questions: "You're over thinking it!"  You cannot make comfort food if you are putting such stress upon yourself...relax...do...enjoy.

Making homemade pasta sauce is relatively easy nowadays, especially since almost everyone and their mother owns a crock pot (slow cooker). Now let’s make an Italian casserole that is so easy, you will kick yourself for having self-doubts on your ability to make it. Hints: if you cannot find ziti in the pasta aisle, use another tubular pasta such as penne or rigatoni. If you want meat in your dish, grill up some Italian sausage or make meatballs. Please, please do not buy frozen meatballs, they are so full of fillers, that is why they can bounce!

Remember, with my sauce and meatball recipes, you can half them, or make the full recipes and they can be frozen for up to six months. You did cut out those recipes, from the newspaper, and put them in your recipe box, right?  Oh, when cooking your pasta up, use a little olive oil in the boiling water instead of salt; still keeps the pasta from sticking together, but adds more flavor.


Baked Ziti

 Ingredients:

1(16 oz.) box ziti, or tubular, pasta

6 cups homemade pasta sauce plus 2 extra cups

1(16 oz.) bag shredded mozzarella plus 1(8 oz.) bag shredded Italian cheese mix

Preparation:

Preheat oven to 350F; spray a 3-quart baking dish with nonstick cooking spray.

Prepare ziti according to package directions. In a large bowl, mix together thoroughly the cooked ziti, 6 cups of sauce and shredded mozzarella cheese.


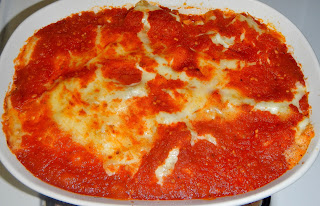
Spread out mixture into baking dish and top evenly with the shredded Italian cheese mix. Bake for 30-40 minutes; until cheese on top is melted and just starting to brown at the edges. 


After Baking

Before Baking


Serve with the extra two cups of sauce for anyone wanting more sauce with their pasta, or to dip bread (preferably toasted garlic bread) into.

Makes 6-8 servings.

 Or use Rigatoni:

Baked Rigatoni


Note: if you have room in the freezer, before baking, split the pasta/cheese mixture between a baking dish, and an aluminum foil baking pan.  Wrap the aluminum foil pan, first with a layer of aluminum foil, then either plastic wrap, or insert into a plastic freezer bag.  Label with name and date; then when ready to bake, remove the plastic, place in oven at 450F for one hour.  Remove aluminum foil, spread Italian cheese mix overall, and bake an additional 15 minutes.  The pasta casserole will be good for up to six months in the freezer.

Mary Cokenour