Friday, December 30, 2011

Shoo Fly, Don't Bother Me.

In Pennsylvania Dutch cooking, there is a pie that would put anyone in a diabetic coma; that pie is called "Shoo Fly".  The name originates from the bakers having to "shoo" flies away from the pie, since the little buggers were very attracted to the molasses and sugar that are the two main ingredients.  "Shoo Fly" is a dense, sticky pie; extremely sweet and definitely an acquired taste.  It is best served warm with a scoop of ice cream, usually vanilla, on the side; strangely enough, the ice cream mellows out the pie's sweetness.

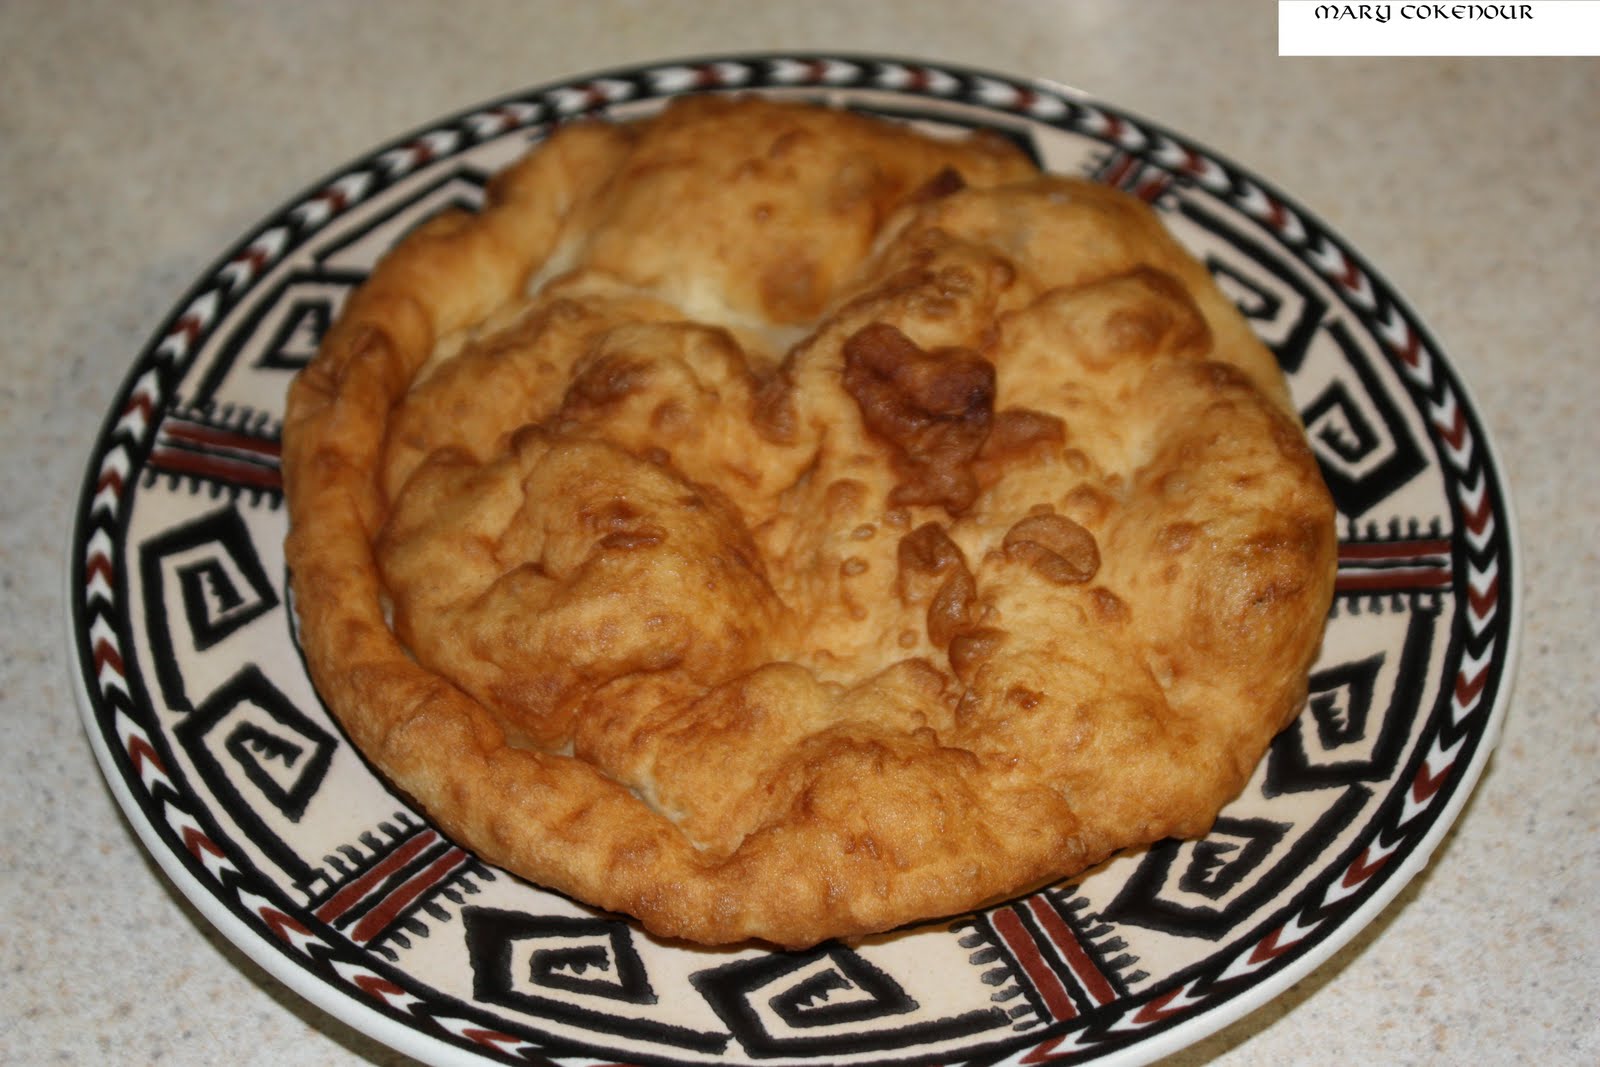
Farmers' Markets are the best places to find these pies as they are baked primarily by the Amish and Mennonite; and they make them fresh.  You can find them in most Pennsylvania supermarkets, but unless they are baked right there in the supermarket, chances are they may be full of preservatives.  Take the extra time, go to the local farmers' market and buy it freshly made; you won't regret the choice.

Finding Amish and Mennonite recipes can be easily done as there are many books available, and many sites online with recipes also.  Each book and site claims that their recipe is the authentic one, but basically every county has a recipe, nevermind every family.  Play around with recipes and see which one may be to your liking; or you may end up inventing your own after some trial and error.  That is how my recipe came about, so try it, change it or just keep looking for another recipe you like better.


Shoo Fly Pie

Ingredients:


Filling

1 ½ cups molasses
1 ½ cups warm water
1 ½ tsp baking soda

Topping

4 cups flour, sifted
2 cups sugar
½ cup brown sugar
½ cup butter, melted

2 (9 inch) deep dish pie crusts

Preparation:

On low heat, in a deep saucepan, cook together the molasses and water for 10 minutes; do not let the liquid boil.

While liquid is warming, preheat oven to 375F; cover center rack with aluminum foil in case of dripping. In a large bowl, combine the flour, sugar, brown sugar and melted butter to form loose crumbs.

Add the baking soda to the liquid mixture; it will become frothy; stir well to dissolve all the baking soda. Divide the liquid between the 2 pie crusts; divide the topping between the two, slightly pressing some of the crumbs into the liquid. Bake for 10 minutes; reduce heat to 350F and finish cooking pies for 35minutes; let pies cool slightly before serving.


Serving suggestion: while still warm, serve with a scoop of vanilla ice cream.

Makes 8 servings.

Mary Cokenour

Tuesday, December 27, 2011

"Sex in the Mouth" for Dessert.

There comes a time when you try out a new dessert and it's so good; well it's almost like your mouth is having an orgasm.  My latest cheesecake recipe is one such sweet dish...completely decadent and luscious.

For the holidays, it's not unusual for me to be making cookies, brownies and cheesecakes to give as gifts.  Normally I stick to my two favorite cheesecakes, "Mint Chocolate" or "Toffee Shortbread", but I had several bags of white chocolate chips leftover from cookie making and felt inspired.  I perused several baking books and online recipe sites for ideas; common ingredients were kept on the list, unusual ones discarded.  Baking temperatures were anywhere from 325F to 450F, so I kept to my normal 350F and water bath (bain-marie)baking technique.  As to time within the oven, the 60 minutes allows the cheesecake to bake entirely while the center still looks jiggly; yet it firms up completely once it sets overnight in the refrigerator.

The taste, however, is absolutely, without a doubt, completely decadent.  Rich, creamy, smooth and just the yummiest concoction your mouth could experience.  Nevermind the holidays, this would make a great dessert for Valentine's Day or any other special romantic occasion.  Enough said, lets get to the recipe for an ultimate cheesecake experience.


White Chocolate Vanilla Cheesecake

Ingredients:


Crust

2 cups ground graham crackers or Nilla wafers
8 oz unsalted butter, melted

Filling

2 (8 oz) packages cream cheese
3 large eggs
1 cup sugar
½ cup sour cream
8 oz white chocolate, melted
2 Tbsp vanilla extract

Preparation:

Spray the bottom of an 8 inch springform pan with nonstick baking spray; line the bottom of the pan with parchment paper and spray the paper with the spray also. Mix together the crust ingredients; press into bottom and slightly up sides of pan. Place in refrigerator while preparing the filling.

Preheat oven to 350F. In a large bowl, beat the cream cheese until smooth; gradually add one egg at a time until incorporated. Slowly add sugar and continue to beat until fluffy; mix in the sour cream, melted chocolate and vanilla extract well.

Take pan out of refrigerator and place on aluminum foil which can be drawn up sides of the pan. Pour the filling over the crust and spread out evenly. Place pan into a roasting pan and pour warm water halfway up outside of pan. Bake for 60 minutes; turn off heat and prop oven door open slightly. Let cool for 45 minutes before removing springform pan and place in refrigerator overnight.

Loosen sides of cheesecake with knife before releasing lock on pan; lift off ring. Put large round plate over cheesecake and invert; remove bottom of pan and parchment paper. Flip cake onto another plate to cut and serve.

Option: puree mixed berries (strawberry, raspberry, black raspberry) and spread over top of cake; grate or shave white chocolate over puree.

Makes 8 servings.

Mary Cokenour

Monday, December 19, 2011

Bag of Chestnuts.

While grocery shopping at City Market in Moab, I happened to see a display for Galil Roasted Chestnuts. It is a product from China that is 100% organic, no preservatives, shelled and ready to eat, or use in a recipe. Looking at the photo on the package, it reminded me of childhood days of oven roasted chestnuts; peeling off the tough outer shell and hoping not to get splinters to get to that luscious nugget inside.

Warning, what you see on the package is most definitely not what you'll find in the package. The chestnuts are a dull grey color, wet with a slight slimy feel to them; that lovely brown color is only on the packaging. I was brave though and tried one; surprisingly it had that strong chestnut flavor that comes from oven roasting. It is recommended that the product be refrigerated after opening. The next day I tried another; the wet sliminess was gone and the full flavor was still there. Personally, I find they will take time getting used to snacking on due to the grey color; it's very unappetizing to look at.

Another use for these chestnuts would be in a soup, either for a holiday meal, or just for a cold, wintery warmup. The packages are 3.5 ounces, so you would need 4 packages for the soup recipe I'm going to post here which is mine, not from the Galil company.

Chestnut Soup

Ingredients:

3 Tbsp butter
1 large leek, white part only, chopped and washed
1/2 cup each of diced celery and carrot
3 Tbsp flour
1 tsp crushed thyme leaves
1/2 cup half n' half
6 cups vegetable broth
4 (3.5 oz) bags roasted chestnuts
1/2 tsp paprika
1/4 tsp each nutmeg, salt and ground black pepper

Preparation:

In a large soup pot, melt the butter on medium-high heat; saute' leeks, celery and carrots until the leeks become translucent. Add in flour, thyme and half n' half; bring to a boil and stir till thickened. Add in broth, chestnuts, paprika, nutmeg, salt and pepper; bring to a boil. Reduce heat to low and let simmer for 30 minutes; stir occasionally.

Using an immersion blender, or transferring to a tabletop blender, process soup until smooth.

Note: toppings such as a drizzle of sour cream or crumbled bacon can be served with the soup.

Makes 8 servings.

Mary Cokenour

Sunday, December 18, 2011

Eating Art, even if it is Simply Silly.

Yesterday morning I made one of my favorite breakfasts.  It's a simple meal of a toasted, buttered Thomas' Bagel Thins (everything flavor) and scrambled eggs; usually the eggs are plain (just added in half n' half, salt and pepper), but I wanted ketchup on them this morning.  I placed the bagel thins and eggs on the plate, went to get my coffee and came back to see...well here it is:


To me, it looked like the funniest face I have ever seen on a breakfast plate; I couldn't help but laugh at it.  I had to grab the camera and take a photo and name it the "Goofy Eyed Breakfast".  It tasted the same as usual, and yet I seemed to enjoy it more because of the fun of it.

Then I remembered a photo I had taken awhile back of a salad I had made. It was my team's turn to make a meal for our monthly meetings and I chose to do the salad. I asked if I should bring things separately, so everyone could make their's own up, but was told no, just mix it all together. I considered what items I knew most of my coworkers enjoyed and what was very disliked. However, as I mulled it over I knew I just couldn't throw it all into a large bowl and produce chaos. What I presented was, as quoted by some of the ladies, "too pretty to eat", but eat they did and it was very much enjoyed.


Basically this was "Salad Art" and consisted of:

2 bags of romaine mix (contained shredded carrot and purple cabbage)
1 bag of spring mix

These were mixed together before I topped it off with colorful rows of:

yellow cherry tomatoes
cucumber slices (peeled the cucumber)
shredded extra sharp cheddar cheese
light red kidney beans
wax beans

There was an assortment of salad dressings and once we finally dug into the salad; well it was quite delicious and satisfying to all.

Eating should satisfy the senses, not just the gnawing of the stomach.  So give your eyes a sight and create artwork with your food.

Mary Cokenour

Wednesday, December 14, 2011

True North Snacks are Nuts!.

True North Snacks

Website: http://www.truenorthsnacks.com/

Nuts are a great snack in general; just eating 1/4 cup a day will help bring down blood sugar and blood pressure. Now when I say nuts, I'm talking about those little goodies that grow on trees: cashews, pecans, almonds, walnuts, Brazil nuts, hazelnuts, etc. Peanuts are not in the nut family, they grow underground and are part of the legume family. As a diabetic, eating a snack that is satisfying and helps with blood sugar and pressure is a big plus.

Now canisters of mixed nuts can be expensive and most brands have more than 50% peanuts in the mix. Since we have established that peanuts are not nuts, isn't that a form of false advertising or downright fraud? Now you can find canisters of mixed nuts that specify "no peanuts", but the price is inflated; so, in essence, taking the peanuts out makes the price go up. Not a winning situation from my point of view. One more point before I go on about True North Snacks; after awhile, those mixed nuts get pretty boring.

Ok, so now to True North Snacks; they make combinations of nuts, sometimes peanuts are included, dried fruit, sea salt, organic sugar into tasty, crunchy combinations. They are 100% natural, lower in saturated fat and contain mostly mono and polyunsaturated fats. The combinations are high in fiber and protein; many of the snacks are gluten free also. Recently they came out with a new combo called Chocolate Nut Crunch which contains almonds, pecans and cashews clusters dipped in milk chocolate; is that great or what!?!

If you're looking for a crunchy, delicious snack and love nuts, you have to tryTrue North products.  Anyone reaching for my bag is gonna lose a hand.

Mary Cokenour

Sunday, December 11, 2011

Fish Fry.


Depending on where you hail from, a fish fry can be via a variety of techniques; deep fried, pan fried, oven fried; battered, breaded or plainly seasoned. Luckily, I and my family enjoy seafood, so we can easily say we've had it any way we can, and are not afraid to try new recipes concerning creatures from the world's oceans.

When it comes to frying fish in a deep fryer or pan, the oil becomes one of the big considerations. Vegetable oils such as corn, soybean, palm and sunflower are too easily absorbed by the fish; making it too greasy and unappetizing. Olive oil, while being one of the healthiest oils, can have its flavor overwhelm the flavor of the fish itself. Canola and peanut oils are the best to use as they can withstand high temperatures while not having their flavor or greasiness absorbed by the foods being fried. This is great when thick pieces of fish, such as cod, catfish or bluefish, need to cook longer than say thin filets of flounder, trout or swai.

The batter method is used when making the traditional style English fish and chips which will use the thick pieces of cod or haddock. Becoming more popular though is the use of panko (Japanese) bread crumbs which gives a light, airy, crispy coating for not only fish, but shrimp, chicken and even in pork dishes. For pan frying, coating the fish in bread crumbs or simply seasoning with herbs means less oil is used than in a deep fryer. With a coating, a simple 1/4 inch of oil will do the job for thin (1/4 to 1/2 inch thickness)filets, cooking each side for 5-7 minutes to achieve a flaky, yet smooth texture to the flesh. Simply seasoned, just enough oil to keep the fish from sticking to the pan can be used; you just have to decide if you want to have the skin on and make it crispy, or forego the skin.  Basic seasonings can be lemon, ground black pepper, salt and herbs such as rosemary or thyme; using Italian flavored bread crumbs gives you the seasonings premeasured and premixed into fine crumbs.

When it comes to a fish fry, the process, no matter which you decide on, is easy; it's deciding the type of fish, coating and seasonings that makes the brain go into overtime.  Enjoy!

Mary Cokenour

Saturday, December 10, 2011

Holiday Baking means Cookies Galore.

With the holiday season in full swing, it's that time of year for cookie baking. This year I made 16 dozen cookies (that's 4 dozen each of 4 types of cookies): pumpkin chocolate chip, chocolate chip with walnuts, sugar lemon with ginger icing and peanut butter and blackberry preserves. I know I didn't break any records by making them all within a 3 hour period of time, but it's an accomplishment in my book. Divided up on holiday themed paper plates and wrapped in bright red plastic wrap, I made the rounds of the neighbors. On Monday, the City office, Post Office and two local banks will be receiving the annual goodies from hubby and myself. The folks there have treated us well since we moved to Monticello, so it's only fitting they get this treat for the holidays.

For the holiday season, cookies are a traditional treat and the sugar cookie is one such sweet dish. Usually rolled out thin, so cookie cutters can shape the dough into reindeers, trees, bells and other assorted shapes. They are iced and sprinkled, or designs are penned on with tubes of decorative, colored icing. I make the typically round cookie, but I usually add chopped up pieces of Andes mint candies; this year I tried something different. To my dough making process, I added a tablespoon of pure lemon extract. Making a simple icing from 1 cup confectioner's sugar and 3 tablespoons warm milk; I sprinkled powdered ground ginger over the cookies before the icing set. The smell of the lemon is intoxicating and the taste is very smooth on the tongue; the icing is sweet with the ginger spice just tickling the back of the throat. Simple and nice.


My personal favorite is pumpkin chocolate chip; whether it's pie, muffins, pancakes, bread or cookies, I enjoy the taste of pumpkin and the spices that go best with it.

Pumpkin Chocolate Chip Cookies

Ingredients:


1 cup salted butter, softened
1 cup sugar
1 cup brown sugar
2 eggs
1 ½ tsp vanilla extract
1 cup canned pumpkin puree
3 cups flour
2 tsp baking soda
3 tsp pumpkin pie spice (store bought, or homemade – see note)
2 cups milk chocolate chips
*optional parchment paper or non-stick baking spray depending on type of cookie sheets used

Preparation:

Preheat oven to 350F. If using non-stick cookie sheets (AirBake brand is best in my opinion), no preparation is needed. If using a dark non-stick cookie sheet, lower the oven temperature to 325F. Otherwise, use a non-stick baking spray (flour in the spray) or parchment paper on the cookie sheets.

In a large bowl, on medium speed, beat the butter till smooth; slowly add in the sugars till fluffy (also known as “creaming” the butter with the sugar). Add in the eggs one at a time till well incorporated; add in the vanilla and pumpkin.

In a second large bowl, sift together the flour, baking soda and spice mix. On a slower speed, gently add in the dry ingredients, to the wet ingredients, a cup at at time. Make sure the dry mixture is incorporated well before adding the next cup. Stir in the chocolate chips.

Scoop out the dough with a tablespoon onto the cookie sheets; bake 15-20 minutes, or until cookies are browned. Let rest on the sheets for 5 minutes before removing to wire racks for final cooling.

Makes about 4 dozen cookies.

Note: Pumpkin pie spice can be purchased premade in the store, or made at home.

Pumpkin Pie Spice Blend

¼ cup ground cinnamon
1 Tbsp each ground ginger, nutmeg and cloves
Stir together well and store in an airtight container.

Mary Cokenour

Wednesday, December 7, 2011

Chicken Thighs ala Campbell's.

Campbell's soup has a recipe for a chicken stuffing casserole consisting mainly of boneless, skinless chicken breasts, stuffing and soup, baked in the oven.  It's a simple recipe, but I find that the stuffing and chicken tend to get on the dry side, so I don't make it very often.  Now my mother-in-law found boneless, skinless chicken thigh strips on sale again, and even though we told her not to buy them anymore, she did anyway.  The thigh strips usually have a lot of fat attached to them and after trimming the fat away, the pieces are so small.  Tyson either needs to make larger pieces or stop making the product altogether.  Anyway, I have that recipe for  Sweet and Sour Chicken Thighs, but believe it or not, I wasn't in the mood for Asian food. What the heck do I do with them?

Looking through the pantry, I found cream of mushroom soup and Stove Top stuffing; I also found a bag of chopped broccoli in the freezer and knew I could make this work. Knowing that the original recipe usually comes out dry, I opted to use the crock pot instead and hoped it would produce a moister dish.  I also thought that the fat would melt off the chicken and help to add moisture to the stuffing.

Now I have to warn you that the dish is not a pretty sight, but the taste was pretty darned good. I'm still not a fan of chicken thighs, but my hubby and mother-in-law liked the results which leads me to wonder, "Will she be buying chicken thigh strips again?"


Crock Pot Chicken Stuffing Broccoli Bake

Ingredients:


2 1/2 lbs boneless, skinless chicken thigh strips
1 bag (10 oz) Stove Top stuffing
1 bag (16 oz) frozen chopped broccoli
2 cans (10.5 oz) cream of chicken soup plus one can of milk
1 tsp each ground black pepper, onion powder and garlic powder

Preparation:

Set 4 qt crock pot on low; spray interior with nonstick cooking spray.

Place chicken strips on bottom, spread stuffing over chicken and then the broccoli over the stuffing. In a medium bowl, mix together the soup, milk and seasonings; pour over the broccoli. Cover and let cook for 5 hours.

Makes 8 servings.

Note: boneless, skinless chicken breasts can be used instead of thigh meat.

Mary Cokenour

Monday, December 5, 2011

Stretching the Elk.

So after getting the craving for cheesesteak out of the way, there were still about four servings of the Elk cheesesteak I had already made remaining. Meat, cheese, onions, peppers and I needed to think about what to do with it; then a commercial for Hamburger Helper came on the television and a lightbulb went off in my own mind.

Getting out the pasta pot, filling it with water and setting it on high heat to bring to a rolling boil; I took out the leftovers, placed them in a large skillet and set that onto low heat. Once the water was ready, I added 3 cups of penne pasta to cook plus a sprinkling of salt; the leftovers though were heating up nicely and the cheese was melting. I added to the skillet a 14.5 ounce can of diced tomatoes, draining them first, and this helped the cheese to become a thinner sauce. Draining the cooked pasta, I added that to the skillet also, tossed to coat it all and let it remain on the low heat for an additional five minutes.


All in all, it took about 30 minutes to complete this extremely easy and delicious meal from simple leftovers and the addition of two ingredients; diced tomatoes and cooked pasta. Sorry Hamburger Helper, but you've got nothing on my elk. Wow, could I go so far as to say I've invented "Elk Helper"?

Mary Cokenour

Wednesday, November 30, 2011

Move Over Turkey, Elk Coming Thru.

Today my hunter friend, Charlie Helquist, brought me a most wonderful surprise...fresh Elk meat (roast, ground and steaks). Thank you, thank you, thank you Charlie...you are an awesome guy and you are appreciated!!!

I was definitely sick of turkey leftovers and was craving meat, so was going to make Philly Cheesesteaks for dinner. With the bonus of fresh Elk meat now in my grasp, I took this as a sign to make the cheesesteaks with the Elk steak.

Opening up the paper wrapped package, removing the meat from a plastic bag, I was still amazed at how beautiful Elk meat was; so lean, red and looking like something only a rich person could afford to indulge in. I sliced it into strips and mixed it with 2 tablespoons of light soy sauce (to bring out more of the rich Elk flavor) plus a half teaspoon each of fine sea salt and ground black pepper; also 1 teaspoon of garlic powder. I then placed the bowl containing the meat into the refrigerator for a half hour to settle. During that half hour, I also prepped a large green bell pepper by seeding it and cutting it into 1/4 inch slices; two large onions were cut into 1/4 inch slices.

Over medium-high heat, I heated up 2 tablespoons of canola oil and added in the peppers and onions. Giving them an occasional toss, I did not add the Elk into the skillet until they just began to soften. I spread the meat on top to allow the peppers and onions to start browning on their edges. Then I began mixing all three together, making sure to turn the strips of meat as they too browned. This all took about 20 minutes to accomplish and then the cheese was added - 16 slices of American Cheese plus 8 slices of Provolone. There was about 2 lbs of meat, so this followed my usual 12 slices of cheese for every pound of meat.

Once the cheeses were completely melted and mixed in with the other ingredients, I removed the skillet from the heat source and let it rest for 5 minutes. The cheese sauce thickened and all was ready to be served into sub rolls.


Spectacular! The Elk meat was so tender; all the ingredients had married so well that no one item overwhelmed in taste. Charlie, once again...THANK YOU!!!

Mary Cokenour

Tuesday, November 29, 2011

A Tale of Two Meatballs.

I have my favorite shows that I watch on Food Network and one such show is Guy Fieri's "Diners, Drive-Ins and Dives". Not only do I find places to try, but recipes to try out in my own kitchen. I like Guy too; he's funny, ridiculous at times, and knows how to draw you in to enjoy the show. Many of the places he features does Italian food, so I pay particular attention to those, since Italian is one of my favorite cuisines. I watched as one diner owner prepared meatballs, using sliced bread soaked in milk as the binder for the meat. Funny I thought, I'd heard of this method, but hadn't ever tried it myself; to make that is. If I'd eaten this type of meatball before, I really didn't know as I hadn't thought to ask about it.

Growing up in Bay Ridge, Brooklyn; I learned in my family, and other families, to use bread crumbs, mainly from loaves of Italian bread that had gone stale, ground into fine crumbs and then added to the meat mixture. After I got married, I learned that was the way my first husband's family, who were Italian, also did it, so who was I to question the norm? Then again, I've become a lot more adventurous in the kitchen since those days, and was going to try this other method of bread soaked in milk.

Back on March 18, 2011, I posted my recipe for Homemade Meatballs, but instead of making you search for it, I'll just repost it today and note what changes I made to try the new way.

Homemade Meatballs

Ingredients:

4 lbs lean ground beef (90% or more)
2 lbs ground pork
1 ½ cups Italian seasoned dry bread crumbs
1/8 cup Italian seasoning mix
¼ cup grated parmesan cheese
2 Tbsp minced garlic
1 cup diced onion
¾ cup milk
2 eggs, beaten

Preparation:
Preheat oven to 350F. Spray jelly roll pans with nonstick spray.

In a large bowl, mix all ingredients together thoroughly; making sure all dry ingredients are mixed well with wet ingredients. Form the meat mixture into balls, about 2 ¾” (size of a tennis ball); place on jelly roll pans.

Bake meatballs for 20 minutes; dab on paper towels to remove any grease and immerse into sauce. Allow meatballs to cook in sauce until sauce is ready; 4-6 hours depending on cooking technique being used. Serve with pasta, or use meatballs for a sandwich.

Makes about 20 meatballs.


Out where I live now, you cannot find real, authetic Italian bread made with Semolina flour; it's all made with "enriched white flour" which, to me, is basically plain old white bread.

Instead of the dried Italian seasoned crumbs, I broke up slices of white bread, about 6, and soaked them in 1 cup of milk instead of the 3/4 cup called for in my recipe. I also increased my Italian seasoning mixture to 1/4 cup. Adding this to the rest of the ingredients, I found that you had to work the soaked bread into the meat more, making sure to break up any large clumps. Baking time was the same, but I only got 18 meatballs instead of the usual 20; not a big deal though.

After cooking them in sauce came the taste testing; besides hubby and myself, I asked a couple of other folks to try them out against my regularly made mealballs, without telling them which was which. The conclusion: While the bread soaked in milk meatball had a firmer texture, the overall taste was the same as my original style meatball. Everyone liked both types and would willingly eat both without a problem.

Overall conclusion: it comes down to basically what you grew up on, are comfortable making and eating. At least I know now, that if I'm out of dried bread crumbs, I can use the milk soaked bread and still get a decent result, not a disaster.

Mary Cokenour

Monday, November 28, 2011

So Easy, a Caveman can do it.

Or so as my husband has entitled this blog post. I would have named it, "Not Another What to do with Leftover Turkey Blog Post", but since he cooked, he got the title rights. That's correct, my husband actually took the time to cook dinner once again for me and I bet women all over are jealous. After all the stress and demands of getting Thanksgiving dinner prepped, cooked and cleaned up after, I finally had a melt down. Saturday afternoon the headache and muscle cramping hit big time and decided to stick around until Sunday night. My hunny made me tea and fluffed my pillows, he cooked up scrambled eggs and biscuits as it made me feel calm all over.

However, I had promised him Pepper Steak with Onions for dinner, but I just couldn't find the energy. Who came to the rescue? My hubby and he once again did a great job with the prep work and the cooking of the dish itself. He did moan and groan though and several times gripe, "but it looks so much easier when you do it". Me? I snickered in smug satisfaction.

So kudos to my husband, Roy, and his amazing kitchen skills...when he is desperately hungry that is.


Pepper Steak with Onions

Ingredients:

2 lbs London broil, cut into ¼ inch thick strips
2 medium green bell peppers, seeded and cut into ¼ inch thick strips
2 medium onions, cut into ¼ inch thick strips
2 Tbsp canola oil
½ cup soy sauce
½ tsp white pepper
1 tsp ground ginger

Preparation:

In a large skillet or Wok, on medium-high heat, brown the meat; remove to bowl and set aside. In same skillet or Wok, sauté the peppers and onions with the oil until softened. Add back the meat; add the soy sauce, white pepper and ginger; mix thoroughly. Let cook an additional 10 minutes before serving over white, fried or brown rice.

Makes 8 servings.

Mary Cokenour

Wednesday, November 23, 2011

Traditional Thanksgiving Pies.

As long as I can remember, pumpkin and pecan pies were served for dessert after the huge Thanksgiving meal of turkey, stuffing and all the rest of the trimmings. Whether served plain, with whipped cream or ice cream; when finished with these yummy treats, a good nap was seriously needed.

With all the preparations needed for the feast, baking pies was always the farthest from my mind, so I would purchase pies from the local farmers' markets. This year though, I decided that I had the time to spare and made the pies. Of course everyone was given a steadfast warning, "disturb me while I'm baking and you take your life into your own hands". Yeah, I'm that serious when I'm in the kitchen and need to concentrate; baking takes concentration.

Anyway, the pies came out just fine and it was very hard to resist cutting a slice of each, just to try of course. So here are my recipes for pumpkin and pecan pies.


Pumpkin Pie

Ingredients:

½ cup pecan halves (optional)
2 (9 inch) unbaked or frozen deep dish pie crusts
1 (29 oz) can pumpkin
1 ½ cups sugar
1 tsp salt
1 Tbsp ground cinnamon
1 tsp each of ground nutmeg, ginger and cloves
1 tsp vanilla extract
4 large eggs
2 (12 oz) cans evaporated milk (shake slightly before opening)
3 Tbsp brown sugar, divided in half

Preparation:
Preheat oven to 425F; place a jelly roll pan in oven to warm up. (this will keep the pan from warping while the pies bake). Divide pecans, if using, between the 2 pie crusts, pressing them down slightly into the bottom of the pie pans. (be careful to not go through the crusts)

In a large bowl, mix together the pumpkin, sugar, salt, spices, vanilla and eggs. One can at a time, beat in the evaporated milk until well incorporated into the pumpkin mixture. Remove jelly roll pan from oven and place pie pans on top; ladle pumpkin filling into each until it reaches the interior edge. Sprinkle 1 ½ Tbsp brown sugar over the tops of each pie. (as the pies bake, the brown sugar will produce a crème brule’ effect)

Bake pies at 425 F for 15 minutes; reduce heat to 350F and bake an additional 50-60 minutes; a knife will come out cleanly from center when done. Let pies cool for 2 hours before serving.

Each pie makes 8 servings.

~~~~~~~~~~~~~~~~


Pecan Pie
(Recipe is from Karo Syrup with 2 changes: 1 Tbsp vanilla extract instead of 1 tsp.; 1 ¾ cups pecan halves instead of 1 ½ cups)

Ingredients:
1 cup light or dark corn syrup
3 eggs
1 cup sugar
2 Tbsp melted butter
1 Tbsp vanilla extract
1 ¾ cups pecan halves
1 (9 inch) unbaked or frozen deep dish pie crust

Preparation:
Preheat oven to 350 F; place a jelly roll pan in oven. (warming the pan will keep it from warping as the pie bakes) Place crust into pie pan if it isn’t already done so.

In a large bowl, combine all the ingredients except the pie crust; pour into the pie crust and place onto center of warmed jelly roll pan. Bake for 50-70 minutes; pie will be done when pressing down lightly in the center, it springs back. Let pie cool for 2 hours before serving.

Makes 8 servings,

Mary Cokenour

Monday, November 21, 2011

Give Thanks to Those Cooking your Thanksgiving Meal.

I love Chinese food; I could go to a Chinese restaurant for days and never order the same thing twice.  One dish I enjoy is Sweet and Sour, but I always have trouble deciding between chicken, pork or shrimp; so I end up ordering the combination.  It's like getting a little surprise in every bite; ok, after a while you can tell what is what, but it's still fun to pretend.

Preparing for Thanksgiving entails a lot of work; cleaning the house from top to bottom, doing the shopping for groceries, baking the pies, and a few odds and ends.  Roy's mom and brother come up from Moab to eat with us, so I want everything as perfect as humanly possible.

So what in the world does Chinese food have to do with Thanksgiving Day?  I get worn out, so to spoil me, Roy decided to make dinner and he made me Sweet and Sour Chicken with Fried Rice.  All I had to do was sit on the kitchen stool and supervise, but he did all the work; and he did a damned great job!!! So for those of you busting a gut trying to get heaven and earth organized for Thanksgiving; step back and let a loved one cook a meal for you as their way of giving you thanks for being so wonderful.


Sweet and Sour – Chicken, Pork or Shrimp

Ingredients:
¼ cup canola or peanut oil
1 cup each chopped red and green bell peppers, onions and drained pineapple chucks
2 cups flour
2 Tbsp canola oil
2 Tbsp cornstarch
1 tsp salt
½ tsp ground white pepper
1 egg
1 ¼ to 1 ½ cups of water
2 lbs of boneless, skinless chicken breasts or pork tenderloin, cut into 1 inch cubes; or medium sized shrimp, peeled and deveined; or a combination equally up to 2 lbs.
1 qt of canola or peanut oil for frying
2 cups homemade sweet and sour sauce; kept warm.

Preparation:
In a large skillet or Wok, heat oil on medium-high heat; sauté peppers, onion and pineapple until the edges just begin to caramelize. Remove from oil and set aside.

In a large bowl, combine flour, 2 Tbsp oil, cornstarch, salt, white pepper and egg; gradually add water until a thick batter forms. Add chicken, pork, shrimp or combination into batter making sure to thoroughly coat each piece. Heat the 1 qt of oil in the skillet or Wok over medium-high heat; when temperature reaches 360F, drop several pieces of battered pieces into the oil, but do not overcrowd. Pieces will be done when they are golden brown and float to top of oil; remove to paper towels to drain. Repeat until all battered pieces are done.

Combine sautéed vegetables and pineapple with battered pieces and warm sauce; serve over white, brown or fried rice.

Makes 8 servings.

Mary Cokenour

Saturday, November 19, 2011

Sorry Campbell's, My Recipe is Better.

The other day a link to a recipe popped up on Facebook and it referred to a recipe called "Angel Chicken".  Basically it was a crock pot recipe where Campbell's Golden Mushroom soup, a packet of Italian salad dressing mix, cream cheese and white wine cooked for about 4-5 hours and was then served over angel hair pasta.  Simple recipe and I was willing to give it a try, that is until I went grocery shopping.  At City Market, a Kroger store, they had 2 cans of the condensed soup for $3...that's $1.50 per can if you had a shopper's card.  Otherwise it was $1.79 per can...seriously, almost $2 for a 10.5 ounce can of condensed soup?  I don't think so!

I went home, got online and looked up the ingredient list for the soup; salt and sugar were the first two ingredients and the listing of preservatives and chemical additives was longer than the natural  ingredients.  I broke down the basic ingredients to beef broth which already has salt in it, tomato sauce, white wine, a roux of butter and flour, water and mushrooms.  Finding 8 oz packets of sliced mushrooms on sale for 2 for $3 and having the other ingredients at home; I was off to make my own golden mushroom soup.  But wait you're now saying, the price for the mushrooms was the same as if I'd just bought the 2 cans of soup.  I know, but the idea of deconstructing the processed soup and then recreating from scratch was a much better prospect than convenience.

As the cooking process of the soup commenced, the smell in the kitchen was heavenly; if the entire recipe tasted as good as it smelled, this would be one heck of an accomplishment.  Now unknowingly, I had run out of angel hair pasta, so served the chicken, mushrooms and sauce over linguine instead...it was amazing; simply amazing.  More work than opening a little can of soup...oh yes, but so, so worth all the effort.

So sorry Campbell's, but mine is better.


Golden Mushroom Chicken

Ingredients:

8 Tbsp butter
8 Tbsp flour
1 (8 oz) package, cut into cubes and softened
1 (14.5 oz) can beef broth plus ½ can water
¼ cup white wine
1 (8 oz) can tomato sauce
½ tsp garlic powder
1 tsp each crushed, dried basil, thyme and marjoram
¼ tsp ground black pepper
8 boneless, skinless chicken breast halves, trimmed of fat
1 lbs sliced white mushrooms
1 ½ lbs angel hair pasta

Preparation:

In a large saucepan, medium-high heat, melt butter and whisk in flour; add cream cheese and stir until cream cheese begins to combine with the roux. Add beef broth, water, wine, tomato sauce, garlic powder, herbs and black pepper. Bring to a boil and reduce heat to low; let simmer for 5 minutes.

Set 6 qt crock pot on low; place in chicken breasts, mushrooms on top of chicken; pour the sauce over all. Cover and let cook for 5-6 hours; until chicken is moist and tender.

Prepare pasta according to package directions; place a chicken breast on top a serving of pasta and spoon sauce over all.

Makes 8 servings.

Mary Cokenour

Thursday, November 17, 2011

Bring it to the Party!

Last weekend hubby and I were invited to a "Twilightathon" party at friends', Sean and Heidi, home. While not big fans of shiny vampires, the chance to get out and socialize with other adults was the real treat. Anyone attending was asked to bring a snack to share which is only fair and I had planned on making my Mexican 4-layer dip. Heidi though was hankering for a 7 layer dip and who was I to deny her? Now I'm not going to claim that 4 or 7 layer dip was originally started by me; there are just so many different versions out there, so I'm just posting my take on them.

Anyway, then I was thinking about this little snack treat that I've been dying to make, but it makes so many that it's only good for a party. Hello, did someone say party? I first had this treat way back in 1997 when a coworker brought them in for a Christmas party. They were great and the recipe, only 3 ingredients, was passed around to everyone. Now you can find it on the internet everywhere, so if anyone is declaring they were the inventor....well who really knows by now? Anyway, at Heidi and Sean's party, they went faster than the dip, that's for sure.

So here come the recipes and next time you need a party snack idea, you've got a couple of more recipes to choose from. Enjoy!

Mexican 4 or 7 Layer Dip

4 Layer Dip

Ingredients:

1 (8 oz) container French onion dip (Helleva Good is the best)
1 (8 oz) jar medium, chunky style salsa
2 cups shredded lettuce
2 cups shredded Mexican cheese blend
Tortilla chips

Preparation:
Using a 12 inch round aluminum pizza pan, spread out the onion dip evenly out to the edges; next spread out the salsa over the dip. Evenly spread out the lettuce, then the cheese blend.
Serve with tortilla chips for dipping.


7 Layer Dip

Ingredients:

1 (14.5 oz) can refried beans
1 (8 oz) jar medium, chunky style salsa
2 cups shredded lettuce
1 (12 oz) bag shredded Mexican cheese blend
1 ½ cups sour cream
1 ½ cups guacamole
1 cup each sliced black olives and diced onions, mixed together
Tortilla chips

Preparation:
Using a glass or plastic 2 quart rectangular dish, evenly spread out each ingredient, in order, over the next. Refrigerate for an hour to let the layers settle together. Serve with tortilla chips.

Note: For either dip, using a spatula to spread ingredients allows for smoother, more even layers.

~~~~~~~~~~~~~~~~~~~~~~~~~~~~~~~~~~~~~~~~~~~~~~~~~~


3 Ingredient Pretzel Chocolate Snack

Ingredients:

1 (10 oz) bag square or round waffle pretzels
2 (13 oz) bags Hershey’s Kisses (any one type or a mixture), unwrapped
1 (14 oz) bag plain chocolate M&M’s

Preparation:
Preheat oven to 180F; line a jelly roll pan with parchment paper.

Spread pretzels onto parchment paper; place an unwrapped Hershey kiss in center of each pretzel. When all pretzels have a kiss on them, carefully place on center rack of oven, so they do not shift about.

Within 5 minutes the chocolate will get a glossy sheen to it; carefully remove pan from oven. Gently press an M&M candy in the center of each kiss; the chocolate will squash down and adhere to the pretzel.

Place pan in a cool place to let the chocolate firm up and set. The snacks can be stacked inside a plastic container; place a piece of waxed paper between each layer.

Makes about 75 - 100 pieces; dependent upon using whole pretzels only, not broken pieces.

Mary Cokenour

Tuesday, November 15, 2011

Pies Aren't Always Sweet.

When you hear the word pie, often times your mind thinks of something sweet such as fruit pies or perhaps a rich cream pie with a mile high meringue topping.  Pies can be savory too containing some type of meat and vegetables like Shepherd's or Cottage Pie or even sausage with peppers and onions can make a great filling in a pie crust.

Now how about taking an American classic sandwich, such as the Cheeseburger, and making that into a pie? Yes, it can be done; just check out online recipe sites or basic American cookbooks such as those put out by "Taste of Home" magazine.  Trying to come up with something new for dinner one night, I decided to try my own version of a cheeseburger pie.  Roy and I discussed what we like on a typical cheeseburger; simple items like cheese, of course, lettuce, tomatoes, ketchup, mayonnaise, horseradish mustard, grilled onions and/or mushrooms.  Now how to make this into a pie of some sort and have it be edible; however we both didn't like all the items on one burger, so needed to compromise.

The first attempt wasn't very successful, too bland and if reheated, it was worse.  The filling was also too mushy, so the addition of a binder was needed.  The second attempt came out much better by adding some leftover ingredients from an Italian meal I made, plus using eggs as a binder...sort of like you would with a quiche.  I do intend to play more with this recipe eventually, so don't be surprised if you see an update at a later time.


Cheeseburger Pie

Ingredients:
2-9 inch, deep dish pie crusts (frozen in pans, refrigerated or homemade)
2 lbs lean ground beef
2 Tbsp Italian herbal mix
1 Tbsp minced garlic
1 medium onion, diced
1 (4 oz) can sliced mushrooms, drained
1 cup diced tomatoes
1 (8 oz) can tomato sauce
1 cup ricotta cheese
1 (12 oz) bag shredded sharp cheddar cheese, divided into thirds
3 eggs, beaten
½ tsp each salt and ground black pepper
1 can Pillsbury Grands biscuits

Preparation:
Preheat oven to 350F; if refrigerated or homemade crusts, place in 9 inch pans; place pie crusts in oven for 5 minutes to set dough.

In large skillet, medium-high heat, brown beef; add Italian herbal mix, garlic, onion and mushrooms halfway through browning. Drain excess grease.

In large bowl, mix together beef mixture with tomatoes, tomato sauce, ricotta, 2/3 of the cheddar cheese, eggs, salt and pepper; mix thoroughly. Divide between two pie pans. Divide 6 of the Grands biscuits to form 12 thinner biscuits; press the 1/3 of the remaining cheddar cheese onto one side of the halved biscuit dough. Place 6 on top of each pie (1 in center, 5 around), cheese side up; bake for 20 minutes; let rest for 5 minutes before serving.

Makes 2 pies; 6 servings in each.

Mary Cokenour

Monday, November 14, 2011

Golden Dragon Reigns over Farmington, New Mexico.

Golden Dragon

2324 E. Main Street
Farmington, NM, 87401

(505) 325-5100

Website: N/A

Located directly next to Fresh for Less on Farmington's Main Street is the Golden Dragon Chinese Restaurant. This restaurant is open seven days a week and offers lunch and dinner buffets besides the regular ala carte menu. While it boasts the typical Oriental art upon its walls, the restaurant is open and welcoming, as is the staff.

We were seated at a booth and our drink orders were taken immediately. Unfortunately, we were late for the lunch buffet and too early for the dinner buffet, so needed to order from the ala carte menu. There was much to choose from and the choice was difficult as we wanted to try so much. Next visit, a buffet is a must to experience the variety Golden Dragon offers.

The Wonton Soup is a rich broth filled with vegetables and delicate wontons.

The Eggdrop Soup has a broth similar to the Wonton Soup, but thicker and it also contains vegetables, but cut finer.

Either soup would be an excellent choice as a meal alone, or for comfort if hit with a cold or flu.


Main courses were Chicken with Broccoli and Chicken Chop Suey; Fried Rice and Egg Rolls (served with sweet and sour sauce). Both chicken dishes were loaded with thinly sliced white breast meat and vegetables with light sauces, but flavorful. The fried rice was moist and tender; the egg rolls were crispy and absolutely delicious. This meal was for four people and we still ended up taking food home; and the bill did not break our wallet at all.

If in the mood for Chinese cuisine, the Golden Dragon's cave is where you want your table set.

Mary Cokenour

Golden Dragon Restaurant on Urbanspoon

Golden Dragon on Restaurantica

Sunday, November 13, 2011

Briskets and Gravy.

As much as I love to grill and smoke meats, I am not one of those extreme die hards who are out there in any type of weather manning the grill and/or smoker.  What a quandry though when you are craving a good brisket, but don't want to deal with the cold weather outside.  That's where the crock pot comes in and becomes a best friend; always willing to help out and never complaininng.

After defrosting a four pound beef brisket and trimming excess fat off; I gave it a good massage with my All Purpose Rub. Sealing it inside an airtight container and popping it into the refrigerator, the preparations for Funeral Potatoes was begun. I didn't have any corn flakes on hand though, so a nice layer of shredded sharp cheddar cheese became my topping. Covered with plastic wrap, into the refrigerator that went to keep the brisket company overnight.

Next morning I got the crock pot out; the brisket went inside with all the other ingredients needed. I knew that the onions, tomatoes, chilies and garlic would not just help enhance the flavor of the brisket, but tenderize and moisturize. The rub on the brisket would help season those ingredients also, so the resulting gravy would be awe inspiring.

That evening I knew when Roy would be coming home from work, so I put the Funeral Potatoes in the oven, so they would be ready at the same time as the brisket and gravy. Result? Between the "Hmmm's" and "Oh my's", Roy was able to tell me that this was one of the best meals he'd ever enjoyed. The gravy was stupendous and the threat to eat a bowl of just that was made; he absolutely could not believe how deliciously awesome it was. He kept telling me that the brisket just melted in his mouth, and I have to agree that it was the tenderest brisket I've ever eaten. The Funeral Potatoes were a perfect accompaniment; the flavors melding so well with the beef and gravy.

Ain't that a kicker though, a crock pot giving a grill a run for it's money.


Crock Pot Beef Brisket and Gravy

Ingredients:

4-5 lb beef brisket, trimmed of fat
½ cup all purpose rub
1 (10.5 oz) can French onion soup plus ½ can water
1 (14.5 oz) can diced tomatoes with green chilies – mild
1 ½ Tbsp minced garlic
4 Tbsp flour

Preparation:
Thoroughly coat, and massage in, all sides of brisket with rub; place in airtight plastic container or bag and refrigerate overnight.

Set 6 qt crock pot on low; spray inside with nonstick cooking spray. Place soup, water, tomatoes and garlic in crock pot; whisk in flour until incorporated well. Immerse brisket into liquid, cover and cook for 8 hours.

Remove brisket to rest before slicing. Set crock pot to high; using an immersion blender in the crock pot, or placing liquid into stand blender, puree tomatoes and onions. Let pureed liquid cook for 15 minutes to thicken. Serve over sliced brisket; also good for a gravy over mashed potatoes and/or biscuits.

Makes 8-10 servings.

Mary Cokenour

Wednesday, November 9, 2011

Native American Foods - Navajo Fry Bread

The first time I ever had Navajo Fry Bread was in October 2008 at the Moab Farmers' Market.  Deep fried with cinnamon and sugar over it; it was awesomely delicious.  It reminded me very much of the zeppoli I used to get when I lived in New York, just a flatter version. 

My apologies to the Navajo Nation and my Navajo friends if I get the information too sketchy or not totally correct regarding Fry Bread.  The Navajo dinetah (homeland) is bordered by the four sacred mountains, from northeastern Arizona, western New Mexico and north into Utah and Colorado.  In 1863, Kit Carson was sent to meet with the Navajo to arrange surrender to the United States Army, but that was not to be.  So, their lands were burned and those that were captured were forced to march (what became to be known as "Long Walks") to Fort Sumner.  A 300 mile walk where many of the Navajo died from exhaustion and starvation.  At the Fort, as many as 9000 Natives were forced to live in deplorable conditions; the government supplies of lard, flour, salt, sugar, baking powder or yeast, and powdered milk were often rancid.  Fry bread came from these few foods provided during the 4 years of captivity. 


The above photo is of Fry Bread made by a friend here in Monticello, Anita Hathale. Anita is Navajo and a marvelous weaver which she learned from her mother; she also makes a wonderful Fry Bread. As you can see though, it is not totally flat, like a tortilla or pita would be and it can be eaten many ways. Fresh and hot just out of the fryer; coated with cinnamon and sugar, drizzled with honey; or as a Navajo Taco - seasoned meat, salsa, guacamole, grated cheese and sour cream. The Twin Rocks Cafe in Bluff also uses it to make pizza, and I know I'm trying that next time I get down there.

Now living in Southeastern Utah, it is part of the area known as "The Four Corners", and there is a monument area commemorating this.  The monument is located 6 miles from Teec Nos Pos, AZ on the Colorado Plateau.  While visiting the monument, one of the vendors there was making Fry Bread, and I was able to obtain a copy of his recipe. I am going to reprint the recipe as he had it written.


Navajo Fry Bread

Ingredients:

4 cups all purpose flour
2 Tbsp baking powder
2 tsp salt
1 1/2 to 2 cups very warm water
2 cups oil

Preparation:

1 - Mix dry ingredients together very well.
2 - Add water to dry ingredients and kneed well until dough is soft.
3 - Let it sit for 10-15 minutes (or longer).
4 - Break off golf ball size pieces of dough and pat or roll out to 1/4 inch thick.
5 - Heat 2 cups of oil and carefully place dough into the hot oil.
6 - Fry it to a golden brown and carefully turn and fry the other side.
7 - Drain on a paper towel. Sprinkle with powder sugar, cinnamon or other toppings to your liking.

Makes 8 servings.

Mary Cokenour

Monday, November 7, 2011

Another Adventure in the Realm of Baking.

The first time I ever saw and tried Red Velvet cake was in Pennsylvania. It was being sold at one of the many farmers' markets: slices, whole cakes, half a cake and whoopie pies. I tried a slice and while it was good, I still preferred my old fashioned yellow cake with milk chocolate frosting. Call me a creature of habit, but I like what I like.

Red Velvet cake gets a good dose of its flavor from cocoa powder. A myth is that the red coloring in the cake comes from a chemical reaction between the cocoa powder and the baking soda, but that only creates a brownish-gray color. The red comes from either red food coloring or beetroot juice; frosting for this cake is usually a white frosting or cream cheese. Origins are pretty iffy; the Waldorf Astoria in New York claims to be the inventor of this cake. However, in the Southern United States, a Red Velvet cake was commonly the groom's cake at weddings. Then there are the Amish and Mennonite in Pennsylvania who are known for their outstanding baked treats.

A few weeks ago I purchased some Red Velvet cupcakes at a supermarket and they were absolutely delicious. Being adventurous, I decided it was time for me to tackle this cake. I found many a recipe in books and online, narrowed it down to three, saw what ingredients were listed exactly alike and averaged out the rest. Not bad really and while the cream cheese frosting was pretty good, I found it a bit too sweet for my tastes. Next time I'm going with a plain white frosting.


Red Velvet Cake with Cream Cheese Frosting(makes 8 servings)

Ingredients:
2 ½ cups cake flour (or finely sifted all purpose flour)
1 tsp baking soda
3 Tbsp cocoa powder
1 cup softened butter
1 ½ cups sugar
2 large eggs
1 cup buttermilk
2 Tbsp canola oil
1 tsp distilled white vinegar
3 oz. red food coloring
2 tsp vanilla extract

Preparation:
Preheat oven to 350F; spray 2-9 inch round baking pan with nonstick baking spray; or a light coating of oil with a dusting of flour.

In a large bowl, sift together flour, baking soda and cocoa powder; set aside.

In a small bowl, cream together the butter and sugar until smooth; set aside. In another small bowl, whisk together the eggs, buttermilk, oil, vinegar, food coloring and vanilla. Add liquid mixture to creamed mixture, beat until smooth.

Add the creamed mixture to the large bowl; mix until smooth scraping down the sides as batter is mixing. Divide batter between the 2 baking pans; bake for 30 minutes, or until toothpick comes cleanly out of center of the cakes. Let cool before frosting.

While cake is baking, prepare the Cream Cheese Frosting:

Ingredients:
2 (8 oz) packages cream cheese, softened
1 cup unsalted butter, softened
4 cups confectioners’ sugar
1 ½ tsp vanilla extract

Preparation:
In a large bowl, begin mixing the cream cheese and butter together. Add one cup of confectioners’ sugar at a time, until each cup is well incorporated. Once the entire mixture is smooth; mix in the vanilla. Place in the refrigerator to firm up before frosting the cooled cakes.

Makes enough to cover sides, top and in-between 2-9 inch cakes.

Mary Cokenour

Saturday, November 5, 2011

French Cuisine is a fail at home.

I have only eaten French food a few times and I have to admit I am not a big fan. Can I explain why? Not really, perhaps it was the atmosphere of the restaurants and the pretentious attitudes of the staff that turned me off to it. Perhaps it was the dishes I tried, drenched in sauce and too sweet; not being an expert in French cooking, maybe they weren't cooked correctly in the first place? I don't know.

I am a comfort cook, so more than likely the dishes I had were just too on the frou-frou end of the French cooking spectrum. Now I had heard of French peasant cuisine, so did a little reading about that. That seemed geared more towards my liking for comfort style food, so I came up with a recipe called Rustic Chicken. Earthy flavors with a mild sweetness coming from tomatoes and a just as mild tang from Dijon mustard.

I happen to like the result, but Roy, my hubby, doesn't agree with me. His assessment was, "it tastes too foreign". Now this was confusing to me considering I cook Italian, Slavic, Mexican and Asian cuisines for him. So I pushed for a more specific critique and got, "I don't know, it tastes odd and I just don't like it". Not much to work with there, so I will just say that Roy and I do not like French cuisine, plain and simple.

But here is my recipe, you might like it, you may not, let your palate decide for you.


Rustic Chicken

Ingredients:

2 lbs. boneless, skinless chicken breasts, cut into 1 inch pieces
½ cup shredded smoked ham or thin sliced beef kielbasa
1 can (14.5 oz) diced tomatoes
1 can (15 oz) artichoke hearts, quartered
1 can (8 oz) whole mushrooms
1 ½ cups chicken broth
¼ cup dry red wine
2 Tbsp flour
2 Tbsp Dijon mustard
1 cup long grain rice.

Preparation:

Combine all ingredients, except rice, in a 4 qt slow cooker, set on low. Cover and cook for 6 hours; add the rice, mix, cover and let cook for an additional 30-40 minutes; until rice is tender.

Makes 8 servings.

Mary Cokenour

Thursday, November 3, 2011

This is Dedicated to the One I Love.

When Roy and I lived in Pennsylvania, one restaurant we enjoyed eating at was the LoneStar Cafe.  It was a chain restaurant, but that had great steaks, baked sweet potatoes that needed their own dinner plate to be served on, and amazing appetizers.  The Cheese Fries was the best thing ever; seasoned steak fries smothered in melted cheese and crispy bacon bits; served with a Southwestern Ranch sauce.  Heart attack on a plate and we didn't care.  Then one day we discovered that the restaurant had closed; we knew a couple of the waiters who said they had reported to work, only to find a sign on the door saying it was closed for business.  Talk about a shocker!

Poor Roy, I think he was the most disappointed of both of us, so I decided to come up with a copycat recipe.  Took me a while to get it right, but I did it; and making the sauce was super easy.  While shopping for groceries, I discovered that Hidden Valley Ranch had a Southwestern Ranch dressing.  I purchased a  bottle and discovered it was exactly what was served with the cheese fries.  However, it wasn't always available at the supermarkets, so I learned to make my own by mixing regular Ranch dressing, not the buttermilk type, with Cholula sauce.

Copycat Recipe for LoneStar Cheese Fries

Ingredients:

peanut or canola oil
1 (16 oz) bag seasoned steak fries, frozen
1 (8 oz) bag shredded Monterey Jack and cheddar cheese mix
1 cup real bacon pieces
Hidden Valley Ranch Southwestern Ranch Dressing, or mix Regular Ranch Dressing (not Buttermilk) with Cholula sauce till desired flavor and heat is achieved.

Preparation:

Fill a large skillet halfway with peanut oil, heat on high till a drop of cold water sizzles in pan. Fry the frozen fries one third of a bag at a time; use a slotted spoon to put the fries into the hot oil. Caution: the oil will sizzle and pop from the cold fries. Let cook for 4 minutes, drain on paper towels and repeat till all the fries are done.

Preheat oven to 350F; spray a 2 qt baking dish with nonstick cooking spray. Layer one third of the fries into the dish, spread one third of the cheese and bacon pieces over them; repeat two more times. Bake for 15 minutes; serve with sauce while hot.

Makes 4 servings.

But I'm not finished yet, another one of Roy's joys is the Patty Melt; a diner classic that is rarely found in diners anymore. This is a grill top special - grilled onions, hamburger, rye bread with melted Swiss cheese. I make mine in a cast iron skillet which ensures even cooking, good flavor and a crisp texture to the rye bread.

The Classic Patty Melt

Ingredients:

1 large onion, cut into slivers
2 Tbsp butter
dash of salt and pepper
1 Tbsp balsamic vinegar
4 (1/4 lb each)hamburger patties (80% lean)
8 slices marbled Rye bread
4 Tbsp butter, softened
8 slices Swiss cheese

Preparation:

Melt 2 Tbsp butter in skillet on medium-high heat; add onions, salt, pepper and vinegar; mix and let cook for 15 minutes, occasionally stirring. Once the onions are browned, remove to small bowl and add the patties into the same skillet; cook each side for 6 minutes. Remove to plate to rest.

Liberally smear softened butter onto one side of each slice of Rye bread; place butter side down in skillet. Depending on size of skillet, you may have to do each sandwich individually. Place a slice of Swiss cheese on each slice of bread; let cook for 2 minutes. On one slice of bread, place a hamburger patty and a layer of onions. Flip over the other slice of bread on top of the other, press down with a spatula for one minute. Flip sandwich over in skillet, press down with spatula again for an additional minute. Remove to plate, slice sandwich in half and serve.

Makes 4 sandwiches.

So there you go Roy; a meal just for you cause I love you so very much.

Mary Cokenour

Wednesday, November 2, 2011

Soup battles the Cold Weather.

After I came home yesterday, I noticed that the wind was beginning to pick up and the temperature was starting to drop a bit.  It had been a sunny day, but suddenly it darkened and I noticed the large dark clouds moving into the area.  The weather reports out of Salt Lake City were reporting a cold snap moving in, but the news media never seem to cover our area, so would it reach us?

I like to run on the side of caution, so the crock pot came out and soup was in the making.  I knew it had to be something hardy and filling, just in case snow shoveling became a factor later on.  Beef Barley Vegetable soup does the trick; shredded lean beef with loads of vegetables, plump barley and a rich, thick broth...oh so good and full of comfort, especially on a cold day or night.


Beef Barley Vegetable Soup

Ingredients:

1 cup each chopped carrots, onions and celery
1 cup shredded white cabbage
2 (14.5 oz) cans diced tomatoes
1 tsp each dried, crushed basil, parsley and thyme
1 tsp ground black pepper
1 cup barley (NOT quick cook)
6 cups beef broth
2 lb sirloin roast beef, trimmed of fat

Preparation:

Set a 6 qt crock pot on low heat; spray with nonstick cooking spray. Place all ingredients inside in order of listing. Cook for 7 hrs; take out beef and shred; place back into crock pot, mix and let cook for an additional half hour.

Makes 8 servings.

Mary Cokenour

Monday, October 31, 2011

First Time for Everything.

Yesterday I decided to try something for the first time - baking an upside down cake.  Roy had purchased several cans of pineapple to snack on, the pineapple that is, not the cans.  Since that seemed to be the typical fruit to use for this type of cake, I figured why not?  I printed out a few recipes and they all seemed exactly the same, some adding cherries to the center of the pineapple rings, some not.  Some using cake flour, others using all purpose flour; so I went with what was in the pantry.  Oh, and I had run out of milk, so used half n' half instead which made the cake itself very light and moist.  I like this trial and error stuff, it works out well most of the time, and I've noticed my attempts at baking are getting much better, or so the critics tell me.

So here's my attempt at Pineapple Upside Down Cake.


Pineapple Upside Down Cake

Ingredients:


4 Tbsp butter, melted plus 4 Tbsp butter, softened
¾ cup brown sugar
10 slices pineapple canned in syrup; retain 2 Tbsp syrup
1 cup flour
½ cup sugar
1 tsp baking powder
¼ tsp salt
½ cup half n’ half
1 egg
1 tsp vanilla extract

Preparation:

Preheat oven to 375F; using a nonstick 9” cake pan, pour melted butter inside and sprinkle brown sugar over evenly. Drain pineapple, but retain 2 Tbsp of syrup. Arrange 7 slices over the butter and brown sugar; cut the 3 remaining slices in half and arrange around the side of the pan.

In a medium mixing bowl, sift together the flour, sugar, baking powder and salt. In a small bowl, mix together half n’ half, egg, vanilla and retained pineapple syrup. Add liquid and softened butter to dry ingredients and beat until smooth; pour into cake pan and try not to shift pineapple slices.

Bake for 40-45 minutes; until cake is golden brown and pulls away from edge of pan. Let stand for 5 minutes; turn upside down onto serving dish, tap bottom and sides to release cake. Serve warm.

Makes 8 servings.

Mary Cokenour

Friday, October 28, 2011

Fig Newtons go Crispy.


Generations have grown up on Fig Newtons, the soft cakelike cookie surrounding a filling of mashed figs.  Well now Newtons have jumped into the realm of the crispy cookie with Fruit Thins.  A thinly delicate cookie loaded with small diced pieces of blueberry, fig or cranberry; and other flavors of  brown sugar, honey and citrus oat to compliment the fruit.

Each cookie is made of whole grain, five grams of fat, seven grams of sugar; real dried fruit is a minor ingredient though, since it's near the bottom of the ingredient listing.  Nutritional value is zero, except for the 4% of iron in each serving (three cookies); but you have to give Kraft Foods kudos for using natural ingredients instead of chemicals.

The cookies themselves are satisfying; good flavor and crunch.  The packaging keeps them from being crushed and keeps them fresh, so great for traveling.  While real fruit and veggies are the best snack, Newtons Fruit Thins are a good substitute, especially if you have finicky family members to make happy.

Good job Kraft!

Mary Cokenour

Thursday, October 27, 2011

Twin Rocks Cafe is buff in Bluff.

Twin Rocks Cafe

913 E. Navajo Twins Drive
Bluff, UT 84512-0330

(435)672-2341

Website: http://www.twinrockscafe.com/index.html

Traveling south on Rte 191, on the way to Monument Valley, you'll pass through a little town called Bluff. Known for its artisans and history, be prepared to be tempted to spend the day here. The town is also surrounded by rock formations that will take your breath away; one such being "The Navajo Twins".

The Navajo Twins tower over the Twin Rocks Cafe, Gift Shop and Trading Post; and this is a must visit location while in Bluff. Entering the Cafe, dining is to the right while the gift shop is on the left. The Trading Post is another building next to the Cafe. Seat yourself and a friendly local will bring you your menus, place settings and take a drink order. There is also a patio area for outside dining.

The menu (American, Native American, Mexican and a few International dishes) is small which allows the items available to be done correctly; the Cafe serves breakfast, lunch and dinner; there are also appetizers and desserts available.

Since we arrived at 4pm, the lunch menu was still being served. I chose the Smoked Beef Brisket which came with fries and baked beans. I also had a house salad with honey mustard dressing. All the dressings and sauces are housemade and are quite delicious. The honey mustard dressing was a stone ground mustard which had a hardy, yet comforting taste; not the overly tangy taste normally associated with a mustard dressing. The Brisket, alone, was smoky and tender with very little fat on it. The BBQ sauce had the sweet taste of brown sugar and a mild spiciness; the mustard sauce was tangy and vinegar strong (great for chicken). The fries were crispy outside, fluffy inside and the fry sauce went so well with them. The beans were not in the traditional thick baked bean sauce, but a thinner sauce and had great flavor.


Even though the dinner menu did not start till 5pm, hubby had no problem ordering the Bluff Burrito from it. Loaded with chicken (or beef is desired), sauteed red onion, bell peppers, diced green chiles and Pepper Jack cheese, hand-rolled in a flour tortilla; served with salsa and sour cream on the side. It is a monster burrito and the vegetables were crisp and fresh; with or without the condiments, it was delicious.

Thankfully we did not order any appetizers, or we would not have been able to finish these delicious meals; and we were certainly too full to try any desserts.

Again, when traveling to Monument Valley, make sure to visit Twin Rocks Cafe.

Mary Cokenour


Twin Rocks Cafe on Urbanspoon

Wednesday, October 26, 2011

Walking Sticks and Orange Rolls

Now if you happen to be picturing a posh gentleman wearing a tophat and carrying a fancy walking stick; sorry, wrong walking stick.  The walking stick I'm referring to is from the Phasmatodea species and it is an insect.  The most common colors are green and brown, so they are very adept at being unseen in their environment.  They don't bite, humans that is, and they can easily be kept as a pet and will thrive on organic lettuce.


Roy had often spoken about these little creatures that he remembers from childhood.  On Sunday, just after I had put a batch of orange rolls into the oven, Roy came up to me and said, "Hunny, remember when I told you about walking sticks?  Well lookie what I found outside."  From behind his back he brought his hand out and inside was a brown walking stick...I was mesmerized.  It looked like a 1/4 inch thick, 4 inch long twig with finer twigs branching out from the main body.   It was perfectly still and I immediately got the camera out; I was not missing an opportunity of photographing this wonderful creature.  After awhile, Roy transferred it to my hand and the little guy(gal?) got animated and started to walk about...it was fascinating.  After a few minutes though, it wanted to keep wandering off, so I had Roy transfer it outside and into my herbal garden.

Then I remembered the rolls and ran for the oven; a little browner than I'm used to, but not hard as a stone or burnt.  I let the rolls cool a bit before slathering on the orange cream cheese frosting.  A perfect treat after such an experience with nature.


Orange Rolls with Cream Cheese Frosting

Ingredients:

1(.25 oz) packet active dry yeast
1/4 cup white sugar
1 cup warm water (110 degrees)
1/2 cup cold butter
1 tsp salt
1 cup milk
1 egg, lightly beaten
3 cups all-purpose flour
8 Tbsp butter, softened
1/4 cup each white sugar and brown sugar
2 Tbsp fresh grated orange zest

Preparation:

In a small bowl, dissolve yeast and sugar in warm water. In a small saucepan, over medium heat, melt butter and dissolve salt in milk.

In a large bowl, mix the yeast, egg and flour with the milk mixture to form a sticky dough. Lightly butter a large bowl, place the dough in the bowl and turn to coat with the butter. Cover with a clean, dry linen cloth; let rise in the refrigerator for 8 hours or overnight.

Remove dough from the refrigerator 2 hours before baking. Divide the dough into halves; roll each half out on a lightly floured surface to 1/4 inch thick rectangular shape.

Mix the softened butter, sugars and orange peel in a small bowl. Spread half of the butter mixture over each rectangle. Roll up the dough short edge to short edge and cut one inch slices. Place in greased muffin tins, or 6 into a nine inch greased cake pan; let rise until doubled in size.

Preheat oven to 400F; place tins and/or pans on center rack; bake for 12-15 minutes, or until golden brown. Remove from oven and let cool slightly before putting on frosting.

Makes 2 dozen rolls.


Orange Cream Cheese Frosting

Ingredients:

1(8 oz) package cream cheese, softened
8 Tbsp butter, softened
1 tsp orange zest
1 cup confectioner’s sugar
Orange juice

Cream the cream cheese, butter, and orange zest until smooth and well combined. Turn off mixer; add the confectioner’s sugar plus one tablespoon of orange juice. With mixer on low, combine till smooth; it may be necessary to add an additional tablespoon of orange juice till desired consistency is achieved.

Makes enough to frost 2 dozen rolls.

Mary Cokenour