Wednesday, January 11, 2023

Do Not Over Think the Comfort.

For New Year’s, most of San Juan County was hit by snow storms, dumping much needed moisture in the mountains, and in and around the towns.  This is definitely a blessing!  However, it did make travel difficult, so those truckers delivering goods for the stores, and packages from Amazon, were not thinking themselves blessed.  But that is balance, a pro for a con, and proof that not everyone can be made happy at the exact same time.

All right then, during 2022, I wrote several articles on preserving basic foods, sustainability, and not having the delusion that all will always be available.  Therefore, if readers paid attention, the days locked inside the home, during the storms, should not have been hardship.  Then again, 2020 through 2022, should have been teaching the same notion of making sure to be stocked up, in case of emergency.

Deep breath, let’s put aside the feeling of being overwhelmed, and embrace the healing ideal of comfort.  With food, wanting something to eat, that gives a warm, comforting feeling, could either be simplistic or complicated. Depends on what you believe is a comfort food; while someone believes it is mashed potatoes with butter, someone else is looking for baby new potatoes topped with creme fraiche and caviar.  The one thing that needs to be remembered is that you should be just as comfortable making the dish as you are eating it.

A cuisine that embodies comfort is Italian. Italian food wraps itself around you like a blanket; while the pasta is your pillow, the sauce massages the aches and pains from the body.  Sounds nice?  Funny though how many folks I have met who are scared to death to make Italian recipes.  "It's too complicated or difficult.", "I'll never find all the ingredients I'll need", "How do I know I'm doing it right if I've never tasted it before?"   Answer to all three questions: "You're over thinking it!"  You cannot make comfort food if you are putting such stress upon yourself...relax...do...enjoy.

Making homemade pasta sauce is relatively easy nowadays, especially since almost everyone and their mother owns a crock pot (slow cooker). Now let’s make an Italian casserole that is so easy, you will kick yourself for having self-doubts on your ability to make it. Hints: if you cannot find ziti in the pasta aisle, use another tubular pasta such as penne or rigatoni. If you want meat in your dish, grill up some Italian sausage or make meatballs. Please, please do not buy frozen meatballs, they are so full of fillers, that is why they can bounce!

Remember, with my sauce and meatball recipes, you can half them, or make the full recipes and they can be frozen for up to six months. You did cut out those recipes, from the newspaper, and put them in your recipe box, right?  Oh, when cooking your pasta up, use a little olive oil in the boiling water instead of salt; still keeps the pasta from sticking together, but adds more flavor.


Baked Ziti

 Ingredients:

1(16 oz.) box ziti, or tubular, pasta

6 cups homemade pasta sauce plus 2 extra cups

1(16 oz.) bag shredded mozzarella plus 1(8 oz.) bag shredded Italian cheese mix

Preparation:

Preheat oven to 350F; spray a 3-quart baking dish with nonstick cooking spray.

Prepare ziti according to package directions. In a large bowl, mix together thoroughly the cooked ziti, 6 cups of sauce and shredded mozzarella cheese.


Spread out mixture into baking dish and top evenly with the shredded Italian cheese mix. Bake for 30-40 minutes; until cheese on top is melted and just starting to brown at the edges. 


After Baking

Before Baking


Serve with the extra two cups of sauce for anyone wanting more sauce with their pasta, or to dip bread (preferably toasted garlic bread) into.

Makes 6-8 servings.

 Or use Rigatoni:

Baked Rigatoni


Note: if you have room in the freezer, before baking, split the pasta/cheese mixture between a baking dish, and an aluminum foil baking pan.  Wrap the aluminum foil pan, first with a layer of aluminum foil, then either plastic wrap, or insert into a plastic freezer bag.  Label with name and date; then when ready to bake, remove the plastic, place in oven at 450F for one hour.  Remove aluminum foil, spread Italian cheese mix overall, and bake an additional 15 minutes.  The pasta casserole will be good for up to six months in the freezer.

Mary Cokenour


Wednesday, January 4, 2023

More Fun with BACON!!!

As 2022 comes to its end, we come to a beginning.  We make resolutions, promises to ourselves, that we will be someone better in the new year.  I, of course, do not make such resolutions.  Oh no, I maintain that I will continue to be the same witty, sarcastic and snarky woman you have all come to know and love. 

…and with that, I introduce to you all, to, December 30th – National Bacon Day!  Now this is the way to welcome in the new year, with bacon!  There is just something about the smell and taste of bacon that makes whatever it is put on, or in, simply delicious. Bacon is a pork product; a salt cured and smoked part of the pig which comes from the sides or the belly of the beast. The many varieties of bacon are dependent on the parts used and the techniques to preserve it.

Bacon itself has very little meat to it; it is the fat that gives bacon products most of the flavor and richness; also, its crispiness after frying. Before frying, some of the fat can be removed, frozen and saved for later use. The fat left in a fry pan solidifies at room temperature and can be used like lard or vegetable shortening to flavor biscuits, cornbread, and dressings.  Roy loves fresh green beans, especially after I have fried them up in bacon grease.  Can you hear his arteries hardening?

In America, the typical bacon product used is either thin or thick strips. The thin strips, depending on brand quality, can almost be paper thin; frying up very quickly and leaving behind more oil than a cook knows what to do with. One batch I made recently started out as ten-inch strips and quickly whittled down to crispy, melt in the mouth, snack pieces of three inches.  Prime example of, “you get what you pay for”, since the packages were cheaply priced, and now I know why.

The cut of bacon we prefer is thick; more meaty than thin, less fat which makes more for the eating. The typical ten-inch pieces only shrink down to about seven inches; they do not take longer to fry up either. In a 12-inch skillet, high heat, I was able to cook 6-7 pieces in each batch; each batch took only 8 minutes to fry up to delicious crispiness.

Bacon is often used as a sandwich addition, the most popular is the "BLT" or "Bacon, Lettuce and Tomato". I am not a fan of the raw tomato part as I believe the juice of the tomato simply takes away from the crispiness of the bacon, lettuce and toasted bread. For moisture, I slather on a generous dose of mayonnaise on both slices of bread.


Other cuts of bacon popular in, or finding its niche in, USA cooking and baking are Canadian which comes from the back center (or eye of the round). It is more similar to a traditional ham product than bacon; and if you have eaten an "Egg McMuffin" from McDonald's, than you know what I am referring to. From Italy, Pancetta is a non-smoked, cut extremely thin bacon which will add the mild taste of pork without the smokiness of smoked bacon; sometimes it comes flavored with herbs and spices.  A classic Italian dish which features pancetta is Carbonara; pasta coated in a rich and creamy pancetta and egg sauce.

Basically, no matter how you like your bacon, well what can I say, "It's Bacon!!!".

Need a recipe to welcome in the new year, how about Bacon Wrapped Meatloaf with a Mexican twist?  This is one of those recipes where I was supposed to make one item, but felt it was boring and needed something more. Instead of plain meatloaf, I decided to use the recipe for Tamale Stuffed Peppers, and add, what else, bacon!

First major decision made was to use a roasting pan with a rack instead of a baking dish. Lining the pan with aluminum foil, rack inserted, but also put a sheet of foil over the rack.  Pricking a few holes here and there on the sheet allowed any excess oil to drip through; the meatloaf would not absorb the excess oil, or cook in it and burn the bottom.  The foil also kept the meat mixture from dropping through and falling apart.

Second decision was to trim the slices of bacon and not tuck them under the meat mixture. Being hidden from the heat would keep them undercooked and bacon needs to be crispy.

The bacon added moisture to the lean ground beef, cut easily without crumbling and did not stick to the foil at all. Every bite was infused with the maple flavor of the bacon; but still able to experience the flavors of the Mexican ingredients too. As a garnish, some cool, freshly made salsa was just right.


Bacon Wrapped Meatloaf with a Mexican Twist

Ingredients:

2 lbs. lean ground beef

1 cup each diced onions and tomatoes

1 cup whole kernel corn

1 cup black beans, drained and rinsed

½ cup diced bell peppers

¼ cup diced chile peppers (medium heat)

¾ cup each plain bread crumbs and cornmeal

½ cup milk

2 Tbsp. New Mexico chile powder (medium heat)

10-12 slices thick cut bacon (maple flavor works well)


Preparation:


Line a roasting pan with aluminum foil; place rack inside; place piece of foil over rack and prick several holes to allow for oil drainage. Preheat oven to 375F.


In a large bowl, thoroughly combine all ingredients except the bacon. Remove meat mixture to foil covered rack and carefully form a loaf. Drape bacon strips over loaf, but do not tuck underneath the meat mixture; trim off excess.


Bake in oven for 2-2 ½ hours, or until internal temperature reaches 180F. Carefully transfer loaf to serving platter and cut into slices; bacon would have shrunk and can be used as a guide.


Makes 10-12 servings.

Happy New Year, and celebrate with bacon! 

Mary Cokenour


Wednesday, December 21, 2022

Toast to the Winter Solstice.

December 21st is a busy day for celebrating.  First off, it is the Winter Solstice, the beginning of the end, so to speak.  Earth’s axis tilts away from the sun in the Northern Hemisphere and the sun reaches its greatest distance from the equatorial plane.  This is the shortest day of light, and the longest of night’s darkness.  Yule, however, is a Pagan celebration of the return of the sun which ensures rebirth, renewal of, and the continuation of life on, Earth.

American Eggnog, Mexican Rompope, Puerto Rican Coquito


It is also, once again according to Good Housekeeping magazine, National Coquito Day.  Now before you go running off to your favorite Mexican place to gorge on taquitos, that’s coquito, not taquito.  Alright then, what is a coquito? Coquito means "little coconut" in Spanish and is a traditional Christmas drink that originated in Puerto Rico. The coconut-based alcoholic concoction is similar to eggnog, and is referred to as “Puerto Rican eggnog”.  The cuisine of Puerto Rico is quite different from Mexico, but if Mexican food is the closest you can find, at least you will not be too far off-the-mark.

How different is eggnog from coquito?  Eggnog originated from the early medieval (476 ACE - 1500 ACE) English drink called posset, made with hot milk that was curdled with wine or ale, and flavored with spices.  Posset use was primarily medicinal as a cold and flu remedy.  In the American colonies (1700s), George Washington, our first president, came up with his own recipe for eggnog.  He did not mention how many eggs to use, but culinary historians estimate an even dozen.

George Washington’s Eggnog Recipe

One quart cream, one quart milk, one dozen tablespoons sugar, one pint brandy, 1/2-pint rye whiskey, 1/2-pint Jamaica rum, 1/4-pint sherry—mix liquor first, then separate yolks and whites of eggs, add sugar to beaten yolks, mix well. Add milk and cream, slowly beating. Beat whites of eggs until stiff and fold slowly into mixture. Let set in cool place for several days. Taste frequently.

Please note, it was heavy on the alcohol, and no one felt any pain after a few tankards of this drink.

Of course, the recipe has been simplified, or over indulgent in alcohol, depending on which recipe you happen to find.  Here’s a simple Americanized version.

Traditional American Eggnog 

(From: https://www.whats4eats.com/beverages/eggnog-recipe)

Ingredients:

Eggs, whites and yolks separated -- 4

 Sugar -- 1/3 to 1/2 cup

 Milk -- 2 cups

 Heavy cream or half and half -- 1 cup

 Rum or brandy -- 1/2 to 3/4 cup

 Nutmeg -- 1 teaspoon

Preparation:

In a large bowl, use a whisk to beat the egg yolks until they lighten in color. Add the sugar and beat until it is fully dissolved. Stir in the milk, cream or half and half, rum or brandy and a pinch of nutmeg. Chill well.

In a clean bowl, beat the egg whites until they form soft peaks. Add 1 tablespoon of sugar and beat some more until they form stiff peaks. Fold the whites into the yolk-cream mixture with a spatula. Pour into a serving pitcher and chill.

When ready to serve, pour into individual serving glasses and sprinkle with a pinch of nutmeg.

Makes 4 to 6 servings.

Of course, eggnog, with or without alcohol, can be purchased at many supermarkets, or local markets.

Well now, doing all this research on eggnog, guess what I discovered?  Mexico does have its own version, so going for those taquitos, or the whole of several enchiladas, will not be an off-the-mark thing after all.

Rompope (Mexican Eggnog)

(From: https://www.isabeleats.com/rompope-mexican-eggnog/)

Ingredients: 

6 cups milk

1 1/4 cups sugar

1 cinnamon stick

1 whole clove

1/4 tsp. ground nutmeg

1/3 cup slivered almonds

1 tsp. vanilla extract

 8 egg yolks, whisked

 ½ to 1 cup dark rum, for serving

Preparation:

Add milk, sugar, cinnamon stick, clove, and ground nutmeg to a large pot over medium heat. Whisk together to combine.  Bring to a simmer, whisking every minute or so to ensure that the milk doesn’t burn. Remove from heat.

Carefully transfer 2 cups of the sweetened milk mixture to a small bowl. Add the slivered almonds and set aside. Let the sweetened milk mixture and the soaking slivered almonds sit for 30 minutes to cool down.

Remove and discard the cinnamon stick and clove from the milk mixture with a slotted spoon. If the cinnamon stick broke into small pieces, pour the mixture through a strainer to remove it.

Add the soaked almonds and the liquid into a blender and blend until completely smooth. Depending on the power of your blender, this could take anywhere from 1-4 minutes on the highest setting. Add the blended almond milk and vanilla extract to the pot. Whisk together to combine.

Slowly pour in the egg yolks, whisking constantly until they’ve all been incorporated into the milk mixture. Place the pot over medium-low heat for 12-15 minutes, whisking the mixture every minute or so, until it has thickened enough to coat the back of a spoon.

To serve warm, add 1/2 to 1 cup of rum and whisk to combine. Serve in mugs topped with a sprinkle of cinnamon.

To serve cold, add 1/2 to 1 cup of rum and whisk to combine. Let the mixture cool for 1 hour, then cover and refrigerate until completely chilled. Serve in cups over ice topped with a sprinkle of cinnamon.

Makes 8 servings.

…and last, but not least, to honor National Coquito Day, here’s a recipe for the Puerto Rican version of eggnog.

Coquito

(From: https://thenovicechefblog.com/coquito/)

Ingredients: 

1 and 1/2 cups rum

2 cinnamon sticks

4 oz. raisins, optional

1 (14 oz.) can sweetened condensed milk

1 (15 oz.) can cream of coconut (Coco Lopez)

1 (13.5 oz.) can coconut milk (with thick coconut cream on top)

4 oz. evaporated milk

½ tsp. freshly ground nutmeg

1/2 tsp. ground cinnamon

1/2 tsp. vanilla extract

4 Tbsp. shredded coconut, optional

Preparation:

In a blender, puree all the other ingredients. Pour into the bottle and shake well to combine with rum/raisins mixture. 

Chill for at least 4 hours before serving to allow flavors to meld and coquito to thicken. (The coconut cream will thicken as it chills.)

Store in airtight container in refrigerator for up 2 weeks. Shake vigorously each time before serving!

OPTIONAL: In a large pitcher with a lid (or two large jars with lids - this will make about 56 oz of liquid) add rum, cinnamon sticks, and optional raisins (if using). Let sit for at least 1 hour, or up to a week. (This will add an extra depth of flavor to your coquito.)

Enjoy whichever version strikes your fancy, but remember, if it contains a lot of alcohol, and you imbibe generously, you just might find yourself, dancing sky clad under the moonlight, like a Pagan.

Mary Cokenour


Wednesday, December 14, 2022

Roast Chestnuts Day.

“Chestnuts roasting on an open fire.

Jack Frost nipping at your nose.

Yuletide carols being sung by a choir.

And folks dressed up like Eskimos.”

The Christmas Song by Mel Torme / Robert Wells


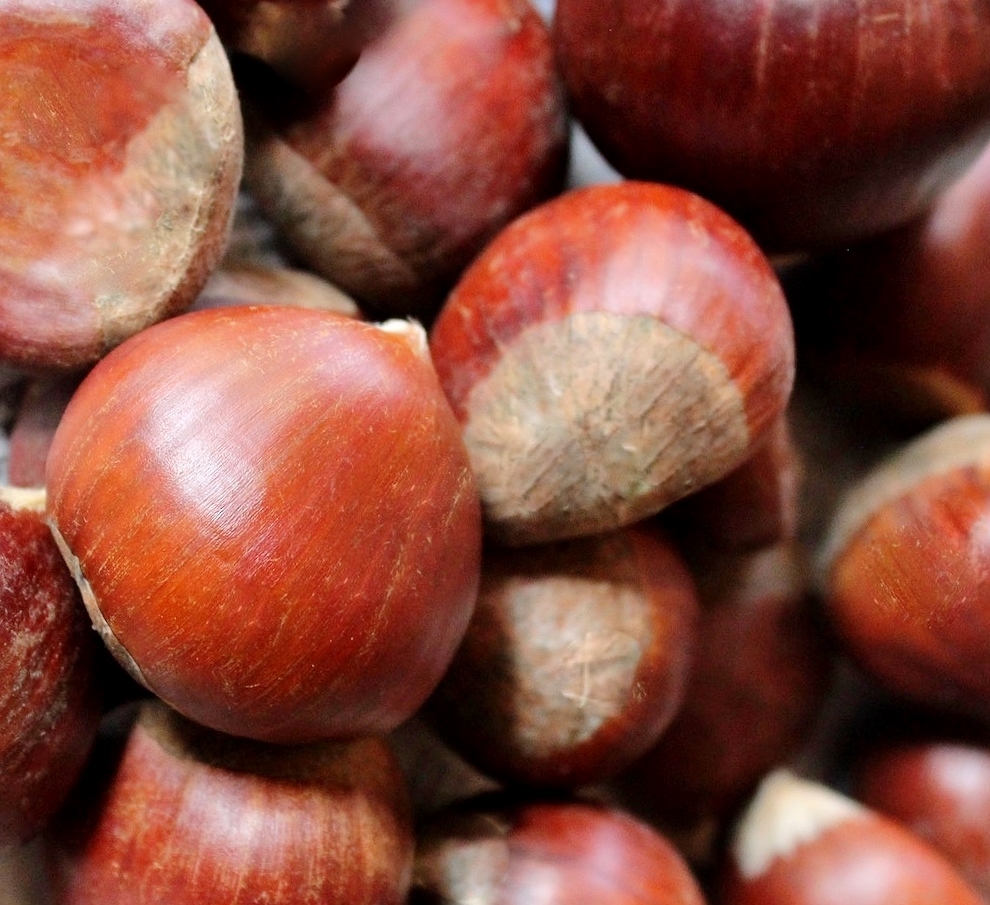
Once again, I am referring to Good Housekeeping’s list of December days of celebration, and have chosen December 14th – Roast Chestnuts Day.  The name “chestnut” has a multi-cultural lineage beginning with ancient Greece, moving into France and England, with European explorers finally bringing their variety to North America.  The American chestnut was a staple of the indigenous peoples, but a blight came along with the Europeans, and nearly wiped out the American species.  The chestnut is a true nut which means, in botanical terminology, “Dry fruit, grown on trees, that has a single seed, a hard shell, and a protective husk, is a nut; this includes chestnuts, hazelnuts, pecans and walnuts.”

Chestnuts are low in fat, high in Vitamin C, and contain antioxidants which help lower the risk of heart disease and stroke.  Good news for diabetics, and better news is that they are high in fiber, and help balance blood sugar levels.  By the way, they are low in calories too.  Sounds like the perfect snack, right?  Yes, they are, but they must be cooked, either by boiling or roasting as raw chestnuts contain tannic acid.  Tannic acid is known to cause, in some people, stomach irritation, nausea, and kidney and liver issues which may lead to severe disease.


Tis the season to see displays of various food items, only available during the holidays.  While raw chestnuts are becoming more difficult to come by, a packaged product, Galil Roasted Chestnuts, might be a substitute.  It is a product from China that is 100% organic, no preservatives, shelled and ready to eat, or use in a recipe. Looking at the photo on the package, it reminded me of childhood days of oven roasted chestnuts; peeling off the tough outer shell and papery interior coating, hoping not to get splinters.  All that work to get to the sweet, buttery soft nugget inside.

 Unfortunately, here comes my warning about the product, what you see on the package is most definitely not what you will find in the package. The chestnuts are a dull grey color, wet with a slight slimy feel to them; that lovely brown color is only on the packaging. I was brave though and tried one; surprisingly it had that strong chestnut flavor that comes from oven roasting. It is recommended that the product be refrigerated after opening. The next day was another taste test; the wet sliminess was gone and the full flavor was still there. Personally, they will take time getting used to snacking on due to the grey color; it is very unappetizing to look at.  While these were the only packaged chestnuts I found in a supermarket, online shopping will provide more variety.

Another use for these chestnuts would be in a soup, either for a holiday meal, or just for a cold, wintery warmup. The packages are 3.5 ounces, so four packages would be needed for the soup recipe I am sharing with you.


Chestnut Soup with Cracked Black Pepper

Chestnut Soup with Bacon


Chestnut Soup

Ingredients:

3 Tbsp. butter

1 large leek, white part only, chopped and washed

1/2 cup each of diced celery and carrot

3 Tbsp. flour

1 tsp. crushed thyme leaves

1/2 cup half n' half

6 cups vegetable broth

4 (3.5 oz) bags roasted chestnuts

1/2 tsp. paprika

1/4 tsp. each nutmeg, salt and ground black pepper

Preparation:

In a large soup pot, melt the butter on medium-high heat; sauté' leeks, celery and carrots until the leeks become translucent. Add in flour, thyme and half n' half; bring to a boil and stir till thickened. Add in broth, chestnuts, paprika, nutmeg, salt and pepper; bring to a boil. Reduce heat to low and let simmer for 30 minutes; stir occasionally.

Using an immersion blender, or transferring to a tabletop blender, process soup until smooth.

Note: toppings such as a drizzle of sour cream, cracked black and red pepper, or crumbled bacon can be served with the soup.

Makes 8 servings.

Mary Cokenour

Wednesday, December 7, 2022

A Day of Infamous Remembrance.

According to an article, in Good Housekeeping magazine, there are 142 reasons, for celebration, in the month of December.  Instead of only the big three, Christmas, Hanukkah and

Kwanzaa, we have Boxing Day on the 26th, and my birthday as well; New Year’s Eve (31st), Yule/Winter Solstice (21st), Pearl Harbor Day (7th), International Animal Rights Day (10th), and a host of other religious, food related, and rather silly days in-between.

With so many “holidays” to celebrate, it would be only right to try and focus on, not the big three, but on some of the other interesting ones.  The first I have chosen is Pearl Harbor Day, observed annually in the United States on December 7, to remember, and honor, the 2,403 Americans who were killed in the Japanese surprise attack on Pearl Harbor.  The attack occurred on the island of Oahu, one of eight major islands of Hawaii, on December 7, 1941, leading to the United States declaring war on Japan the next day, and forced into entering World War II.

https://www.pearlharboroahu.com/ 
 

I was fortunate enough to visit Oahu twice, and made sure to put the Pearl Harbor Memorial tour on my visit list, both times.  This is a heart wrenching, heart breaking experience that left, not one person, without tears streaming down his or her face.  First, there is the movie, using historical footage, showing the bombing, the utter destruction of the Navy’s shipyard, and ships.  Then there is the boat ride out to the USS Arizona which is the eternal grave site of 1,102, of the 1,177 sailors and marines, killed during the attack on Pearl Harbor.  Standing at the railing, looking downward into the murky water, a sheen of oil can be seen as it continues to seep from the bowels of the ship.  One can only imagine what those valiant men experienced as the bombs exploded, the ship tore apart, and down into the water it sank; taking most of them with it.

Divers have attempted exploration of the ship, since the sinking, but it was not until submersible mini-subs, and ROVs, were able to go inside.  With modern technology, the interior was recorded, and everyday items like shaving kits, kitchen pots and pans, even uniforms hanging on clothes hooks, could be seen.

Has this information made you sad?  As I have grown older, I have seen the “holiday months” go from one of grateful, friendly and loving gathering to the point of “why bother?” to “it’s only about the monetary amount of the gifts that counts”.  So, here I am, to remind you, that these months were not always full of 100% joy and good cheer.  People suffered to make sure that freedom remained free, and we should be grateful to them for the joy and good cheer we obtained.

So, after the sadness I have dropped upon you, it might seem a bit like nonsense to suddenly write about food.  However, our sailors and marines, even in 1941, ate well; and up to the nutritional standards known about at that time.  A 1941 ship’s manifest, for the USS Washington declared, supplies the battleship took aboard after about a week at sea with a crew of 1,500 were 2,400 lb. lemons, 1,700 lb. cucumber, 2,400 lb. lettuce, 1,800 lb. each of sweet potatoes, tomatoes and asparagus, 1,200 lb. celery, 3,000 lb. carrots, 3,800 lb. oranges, 1,513 lb. smoked hams, 19,971 lb. of frozen beef, 4,070 lb. veal sides, 507 lb. head cheese, 1,040 lb. flounder and 1,010 lb. rhubarb.” ( https://www.navalgazing.net/Naval-Rations-Part-3).  For Thanksgiving and Christmas, ham and turkey, with all the typical trimmings, were served to all.

Here is a recipe I developed, December 9, 1995, two days after Pearl Harbor Day; those men must have been on my mind, even then.


Sweet Potato Shepherd’s Pie

 This recipe was chosen and featured in the Better Homes and Gardens Magazine, March 1999 issue.  It also appeared in the Better Homes and Gardens “Annual Recipes” cookbook, 1999.

Ingredients:

2 lbs. sweet potatoes

¼ cup milk

½ tsp. each salt, ground cinnamon, ground nutmeg

2 lbs. lean ground lamb

1 cup sliced mushrooms

1 cup chopped red onion

1/3 cup dry red wine

1 Tbsp. snipped fresh savory

1 tsp. finely shredded orange peel

½ tsp. ground cinnamon

Preparation:

Peel and cut up sweet potatoes.  Cook in a small amount of boiling water, just enough to cover, for 20-25 minutes, or until tender; drain.  Mash potatoes; add milk, salt, ½ tsp cinnamon and nutmeg; set aside.

Preheat oven to 350F.  In a large skillet, cook lamb, mushrooms and onion together until there is no longer any pink to the lamb meat; drain excess fat.  Stir in wine and savory; cook for 1 additional minute and remove from heat.

Spray a 2-quart casserole dish with nonstick spray.  Spread 2/3 of the mashed sweet potatoes over the bottom and up the sides of the dish.  Fill center with lamb mixture; top with remaining 1/3 of potatoes, spreading evenly over filling and to edges of dish.  Bake for 20 minutes; sprinkle orange peel and remaining ½ tsp cinnamon over top; bake an additional 15 minutes.

Makes 6-8 servings. 

Mary Cokenour

Saturday, December 3, 2022

No-Bake Eclair Dessert (original and low sugar versions)

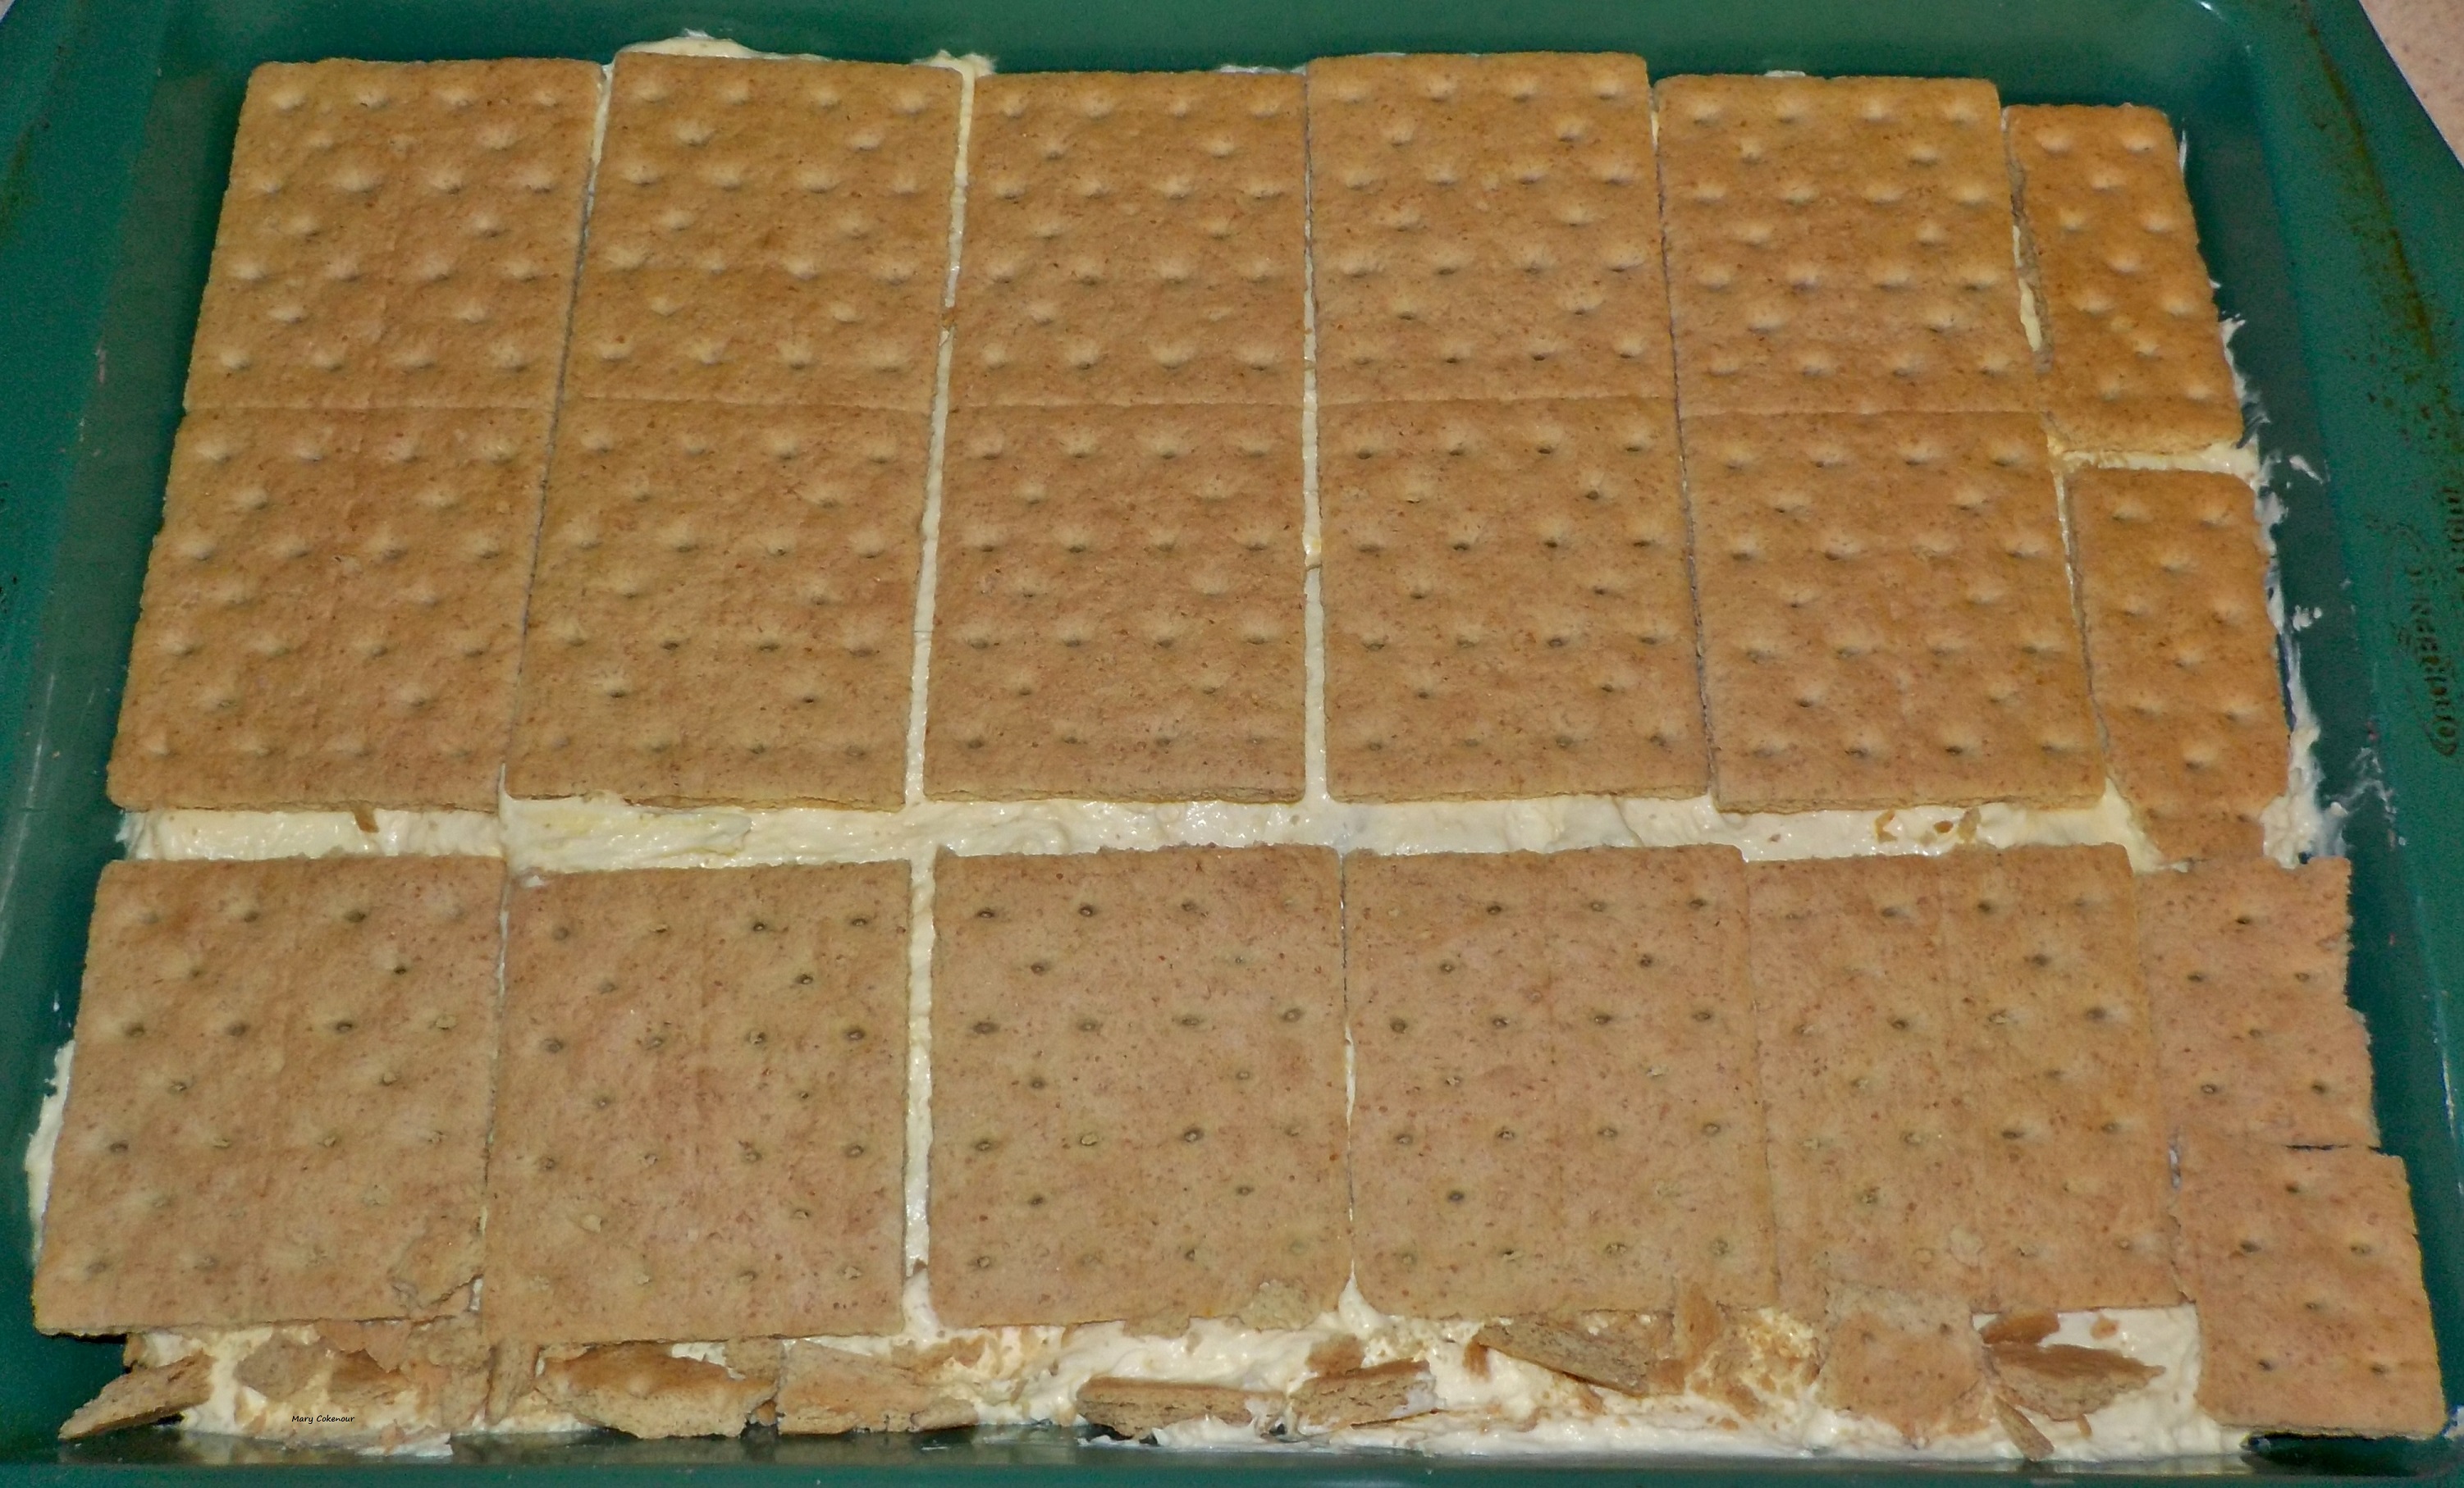
This no-bake éclair dessert is creamy, with the softened graham crackers giving the consistency of a spongy Boston Cream cake, or pastry shell of an éclair.  It is very easy to assemble, with the most difficult part being the wait time before it is ready to be eaten.


No-Bake Eclair Dessert

Original Recipe

Ingredients:

2 (3.4 oz.) boxes vanilla instant pudding mix

3 cups milk

1 (8 oz.) container whipped topping, thawed

1 (16 oz.) box original flavor graham crackers (3 packs containing 9 crackers each)

1 (16 oz.) milk chocolate frosting (dark chocolate would be too overpowering in flavor)

Preparation:

Whisk instant pudding and milk together, in a large bowl, until it begins to set; fold in whipped topping, mix well and set aside.

Place a layer of graham crackers in the bottom of a 9” x 13” dish, breaking as needed to cover the entire bottom with a single layer.

Spoon half of the pudding mixture over the graham crackers and gently spread into an even layer; again, break crackers as needed to fill in spaces. Top with another layer of graham crackers and other half of the pudding mixture. Add one final layer of crackers to finish off top.


Cover with plastic wrap and refrigerate for at least 30 minutes.

Uncover frosting and remove foil wrap. Microwave for 30 seconds to make the frosting easier to spread; stir well. Remove pan from refrigerator and pour frosting over top layers of crackers; use a spatula to spread frosting evenly, and edge to edge.


Replace the plastic wrap and refrigerate overnight, or for at least 6 hours. The longer the dessert sits, the more the crackers soften up to have a cake-like consistency

Makes 15 servings

Optional Frosting: Make a chocolate ganache by heating ¾ cup heavy cream, over medium-high heat, until bubbles form around edge of liquid.  Add 1 cup of milk chocolate chips; allow chips to melt for 2-3 minutes, mix well, then pour over cake.

For a lower sugar version, substitute:

4 (1 oz.) boxes sugar free vanilla instant pudding mix

3 and ½ cups 2% milk

1 (8 oz.) container sugar free or lite whipped topping, thawed

1 (16 oz.) box original flavor graham crackers

1 (16 oz) container milk chocolate frosting (if you can find sugar free variety, use instead) (dark chocolate would be too overpowering in flavor)

Preparation directions are the same.  This is not a completely sugar free version as finding sugar free graham crackers and sugar free frosting can be a challenge.  Serve smaller portions and you will not feel as if you are missing out on dessert.

Mary Cokenour


Wednesday, November 30, 2022

Celebrating Bake Cookies Day.

December 18th is Bake Cookies Day according to Good Housekeeping.  On May 2, 1885, Clark W. Bryan, of Holyoke, Massachusetts, founded Good Housekeeping as a bi-weekly magazine; and became a monthly publication in 1891.  Good Housekeeping has been the go-to magazine for American women, providing information on trends, real-life and fiction stories, advice, recipes and product recommendations.  So, if they say that there is a day dedicated to baking cookies, who is going to argue with that?

Pizzelle, also known as Italian Waffle cookies, can trace their origin back to 9th century Rome.  They are a popular cookie around Christmas time, with a snowflake design on one side; sometimes a second design on the reverse side.  Simple ingredients of sugar, eggs, flour, and butter, or oil, are used; personally, I believe using butter gives the cookies a better flavor and texture.  Flavorings are generally vanilla, anise, lemon, caramel or chocolate.  As with Black and White Cookies (a May 2018 article in the San Juan Record), a pizzella (singular) can have a combination of half vanilla, half chocolate. You can always be daring and add mint extract to the chocolate batter or finely crushed hazelnut meal to the flour. Think of this as using a basic cookie dough, or in this case, batter, recipe and adding your imagination.

Depending on the variations in ingredient amounts, and cooking times on the pizzelle press, the cookies can be either hard and crisp or soft and chewy. They are seen often at Italian weddings, rolled into a cone and filled with cannoli cream (ricotta cheese mixed with sugar). As a sandwich cookie, a filling of cannoli cream or hazelnut spread can be smeared between two cookies. However, the hard and crisp variety is too delicate to withstand a layer of firm ice cream for a sandwich; but is delicious as a crushed topping instead.  Although, a thicker made pizzella is exactly what is used to make those waffle cones you get at the local ice cream shoppes.

The average price, for a pizzelle press, is $50 and can create 2-4 pizzelle, depending on the size in diameter being "baked". There is also a variety of designs that can be pressed upon the batter; the most popular being a snowflake or star.  If you are not inclined to buy a press and make your own pizzelle; the cookies are usually available in the bakery section of major supermarkets; or online stores.

A serving of six (4 inch) cookies is about 140 calories, containing 6 grams of fat and 19 grams of carbohydrates. Pair this with fresh fruit and it makes an excellent meal in itself.  If this does not entice you, then I am clueless as to what will.  Enjoy!

Basic Vanilla Pizzelle

Ingredients:

3 large eggs

3/4 cup sugar

8 Tbsp. unsalted butter, melted

1 Tbsp. pure vanilla extract

1 3/4 cups flour

2 tsp. baking powder

Preparation:

In a large bowl, beat the eggs and sugar together until fluffy and a yellow color. Make sure the butter has cooled to room temperature before adding into the egg mixture; this will keep the eggs from curdling. Add the vanilla extract; do not over mix.

Sift together the flour and baking powder and gently fold into the wet ingredients until well incorporated.

Follow the instructions on the pizzelle press for batter measurements and proper cooking time. When done, remove to a wire rack for cooling.

Makes 2-3 dozen depending on size made.

Mary Cokenour