Showing posts with label food adventures. Show all posts

Monday, January 7, 2013

Francisco's of Durango, Colorado is Old World Mexican.

Francisco's Restaurant & Cantina

619 Main Avenue
Durango, Colorado 81301

Telephone: (970) 247-4098

Website: http://www.franciscosdurango.com/


The first time I ever experienced Francisco's was my first visit to the Southwest, back in 2006.  I was fascinated by the decor, more reminiscent of a Mexican hacienda, than a cantina; and totally wowed by the food.  This was authentic Mexican cuisine and I loved it; getting one of their many combination platters was the best way to sample as much as I could.
 
For my birthday, December 26th, I decided to celebrate it in Durango, and most especially, by eating at Francisco's once again.  Oh, since moving to Utah we had gone several times before, but this was my birthday and I wanted the best Mexican food in the area.  My husband Roy, and son Bill, were along for this adventure.  Once seated at our table, drink orders were taken and we were served with Francisco's own salsa which is available for sale at the front counter, and warm tortilla chips.
 
 
My husband ordered: Combo #6 Enchiladas Rancheros which is one beef and two cheese stacked enchiladas smothered in green chili and served with an egg on top. The green chili is mild and becomes increasingly rich when the yolk from the egg is mixed in.


I ordered: Combo #12 Enchiladas de Pollo which is two chicken enchiladas served with Spanish rice and beans. The shredded chicken is very tender, but the red sauce is spicy and makes your taste buds salsa dance.


My son ordered: Combo #19 Burrito de Puerco which is seasoned slow-cooked pork wrapped in a flour tortillas and topped with salsa verde, jack and cheddar cheese. The salsa verde was a sweeter type of sauce and the pork was very tender. All the combination plates came with fluffy rice and refried beans which were smooth, not pasty.


For dessert we enjoyed Sopapillas, deep fried tortillas that puff up to a crispy shell on the outside and fluffy goodness on the inside. Opening one up, the steam escapes and drizzled honey inside makes the experience a complete joy.

By the way, if you like fish tacos, try Francisco's Combo #17 Fish Tacos: Two flour tortillas filled with grilled tilapia, lettuce, cheese, black beans and Tabasco mayo. Served with avocado relish and all absolutely delicious!!!

Visiting the Durango, Colorado area and in the mood for Mexican, do not pass up Francisco's.

Mary Cokenour

Francisco's Restaurante on Urbanspoon

Saturday, January 5, 2013

Noodling through Asian Cuisines.

Typically, when you go to a Chinese take-out, the most popular noodle dish is Lo Mein; a noodle which resembles Italian Spaghetti.  However, it can come in a flat variety similar looking to Fettucine and used in dishes like Ho Fun; the wider variety is used for Chow Fun.  At home, there is the ever popular Ramen noodle that comes in a solid block form which can be used for making soups or main dishes such as Stir Fry.  Cellophane Noodles or Threads are made from mung bean sprouts and resemble Vermicelli.

 
Then there are Japanese noodles such as Soba and Udon; Soba is made from buckwheat and resembles Spaghetti, while Udon is made from wheat, resembles Fettuccine and is more thick and chewy.  In Thai and Vietnamese cuisines, noodles are made from rice flour.   Basically what I am trying to get across is that you shouldn't be discouraged from making Asian recipes if you cannot find the "correct" type of noodle in your local market.  Many pasta companies are introducing products made with wheat or other grains, not just the egg and white flour variety.

My recipe today is a noodle dish which works well with Lo Mein, Soba or Udon noodles, and if you cannot find these, don't panic!  Substitute Spaghetti or Fettuccine, and you can use whatever grain variety you like: white, wheat or multi-grain flour.  Part of comfort cooking is not just the feeling you get when eating the food, but how you feel as you're creating it.  If you're not in a good place feeling wise, chances are that your dish won't be once it's completed.  Relax and enjoy.

I'm calling today's recipe "Fireworks Shrimp and Noodles"; first, because of the eye popping colors of the carrots and edamame.  Secondly, I use Sriracha, a Chinese Chili sauce which can knock your taste buds on their little butts.  The amount I use in my recipe will give you some heat, but not the burn.  If you cannot find Sriracha, then substitute Thai Chili sauce; worse comes to worse, then use whatever hot sauce you have on hand.  Remember, start small with the amount of hot sauce; you can always add, but you cannot take away.


Fireworks Shrimp and Noodles

Ingredients:

1 (12 oz) package Asian noodles (lo mein, soba, udon)
1 (8 oz) package frozen shelled edamame (soy beans)
1 (8 oz) package frozen julienned carrots
1 tsp minced garlic
1 tsp minced ginger
1 tsp hot sauce (Sriracha or Thai chili sauce are best)
2 Tbsp canola oil
2 Tbsp soy sauce
1 Tbsp sesame oil
1 lb large shrimp, peeled and deveined

Preparation:

Prepare noodles according to package directions; 5 minutes before noodles are done, add the edamame and carrots; finish cooking the noodles.  Drain, but reserve a ½ cup of cooking water; mix the water back in with the noodles and vegetables and also mix in the garlic, ginger and hot sauce.

In a Wok or large skillet, heat oil on medium-high heat; cook shrimp until they turn pink, about 2-3 minutes. Add the noodle/vegetable mixture plus the soy sauce and sesame oil. Mix thoroughly and cook an additional 2 minutes before serving.

Note: additional hot sauce can be added if desired.

Makes 4 servings.

Mary Cokenour
January 5, 2013

Thursday, January 3, 2013

It's Beefy, Eggy and Good Anytime.

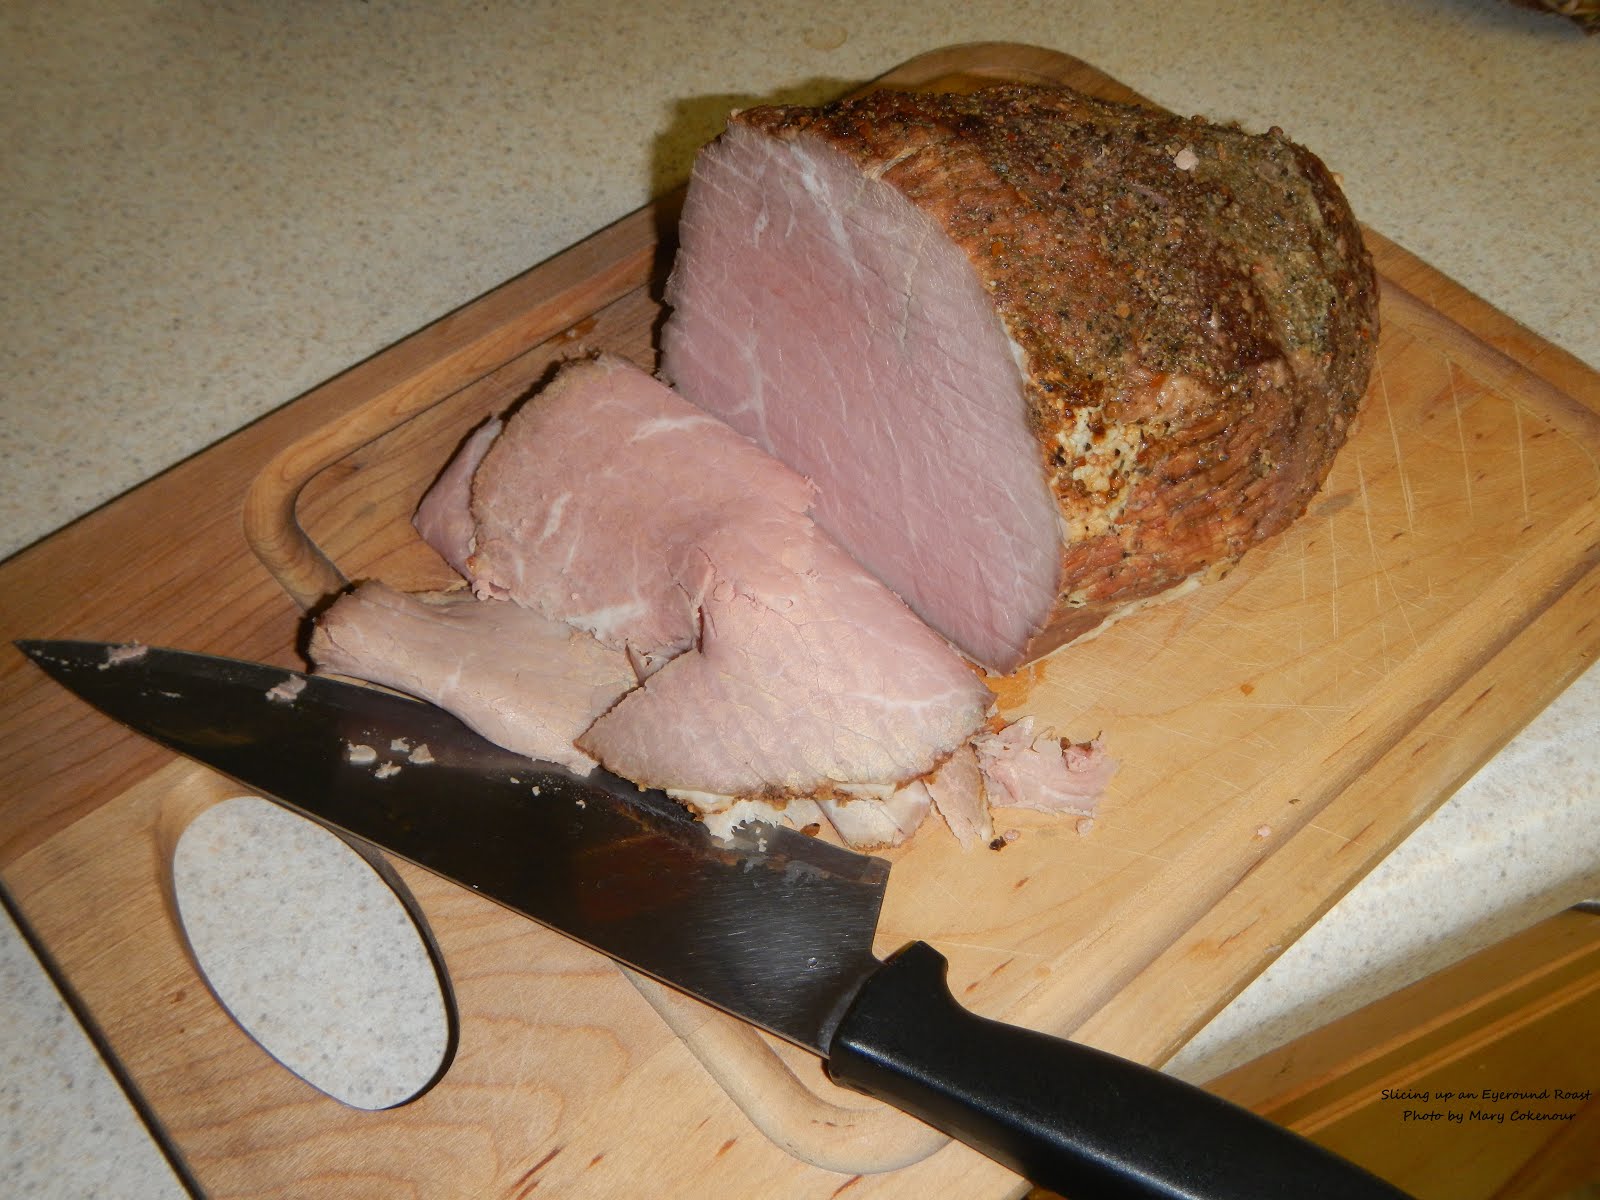
Recently I enjoyed an adventure in making a Prime Rib for the first time. Then I did a bit of thinking, yes I do that on occasion, and wondered if the roasting technique I used on the prime rib could be done with other types of beef roasts. Instead of buying cold cuts at the supermarket, I usually roast my turkey and chicken breasts, glazed ham or roast beef; then thin slice them for sandwiches or chopped up for salads.

This time I had a lovely, lean eyeround roast waiting for its turn in the roasting pan.  Leaving out the rosemary and thyme, I only seasoned the meat with the salt, ground black pepper, garlic and onion powders; but cooked it the same way as I had done with the prime rib.  Again, I relied on my meat thermometer to tell me when it reached medium-rare.


Now one morning hubby wanted breakfast and he was thinking along the lines of eggs, bacon and cheese on a toasted roll.  Well he got more than he bargained for, as I like to think and cook outside the box.  You see, I had forgotten to take the bacon out of the freezer for defrosting, but the container holding that lovely roast caught my eye....and the cheddar cheese slices, and the mayonnaise, and the butter.  I never said this was going to be a heart healthy sandwich, but you can always tweak what I'm telling you here to your own needs.  Back to the story....


After slicing open the Kaiser roll, I buttered up the outside top and bottom of the roll, just like I was going to make a grilled cheese sandwich.


Heating both my griddle pan and 8 inch skillet, I opened up 2 eggs which went into the 8 inch skillet.  The Kaiser roll went butter side down on the griddle pan with a smear of mayonnaise on both face up sides.  A slice of mild cheddar cheese also went down over the mayonnaise; while several very thin slices of beef sat on one roll half.  I flipped the eggs over as hubby likes them over easy, let them cook a bit before sliding them on top of the beef.  Now here's the important part, place the cheese only side of the roll over the eggs and press down lightly; you don't want to break the yokes.   Let the sandwich fry for about another minute before moving it to a plate.

 
...and there you have it, the Beef and Egg Anytime Sandwich. Why did I name it "Anytime"? Hubby enjoyed it so much, he wanted one for dinner that night; and then again for lunch on another day.

Be warned though, you will need lots of napkins for this sandwich. Pick it up whole, bite into it and you'll get a gush of egg yolk all over your face and hands. Cut it in half, pick it up and the egg yolks will still get on you. However, once you taste it, you won't care the slightest. The crunch of the butter fried roll, the smooth melty cheese, seasoned beef enriched with the mayonnaise intertwined with yolky goodness. Yes, you will think, this is nirvana!!!

Enjoy!

Mary Cokenour
January 3, 2013

Wednesday, January 2, 2013

Rolling into the New Year of 2013

...with Pumpkin Roll. That's right, we're starting this food blog off with another dessert made with pumpkin. Technically we're still in the holiday season, and pumpkin does start off the season in October when the jack o'lanterns come out for Halloween. For the 2012 holidays, we also made Pumpkin Chocolate Chip Cookies, Pumpkin Bread, and Pumpkin Pie, so lets finish off the season and start the New Year with some cake.

Making a rolled cake takes patience, and a batter that produces a cake which is not too firm, but not crumbly either; you need it to be pliable without falling apart.  You also need a jellyroll pan (a 15"x10"x1"); it sort of looks like a rectangular baking sheet, but with an edge around it. The name comes from the original cake that was made in it; a thin yellow cake with a fruit jelly spread onto it, then rolled...the jellyroll cake.   Another popular jellyroll style cake is made with a dark chocolate cake and a white cream filling, or what is typically called the Swiss roll cake.  With this cake, there is the option of giving it a coating of chocolate or not.

Definitely use wax paper with this cake, not parchment paper, as it will peel off much more easily.  Also, use a lint free linen towel to help with the rolling; nothing is more unappetizing than to find cloth fibers in your cake or filling.  Thirdly, make sure you give yourself room to work like a large area of counter space, or even a table.  So lets get to it....


Pumpkin Roll

Ingredients:

1 tsp each ground nutmeg and cinnamon
½ tsp each ground cloves and ginger
1 cup sugar
3/4 cup flour
1 tsp baking powder
1/8 teaspoon salt
3 eggs
3/4 cup canned pumpkin
1 cup plus 2 Tbsp confectioners' sugar
1 package (8 oz) cream cheese, softened
3 Tbsp butter, softened
1 tsp pure vanilla extract
Confectioners' sugar to sprinkle over finished cake

Preparation:

Preheat oven to 350°F. Spray a15x10x1-inch baking pan (jellyroll pan) with nonstick baking spray; line pan with wax paper and spray paper. In a small bowl, mix together spices. Mix sugar, flour, baking powder, 2 and ½ teaspoons of spice mixture and salt in large bowl. Beat in eggs and pumpkin until well blended and smooth; spread evenly into pan.

Bake 15 to 20 minutes or until toothpick inserted in center comes out clean. Place clean linen towel on kitchen counter or table; dust with 2 tablespoons confectioners' sugar. Loosen cake around sides of pan with sharp knife. Turn out onto towel, wax paper-side up (do not remove wax paper); fold side of towel over one short side of cake, and then roll up cake jelly-roll style. Cool cake completely.

Beat cream cheese, 1 cup confectioners' sugar, butter, vanilla and remaining half teaspoon of spice mixture in medium bowl until well blended and smooth. Unroll cake onto towel; peel off wax paper and spread cream cheese mixture evenly over cake. Using towel, roll up cake and place seam-side down on serving platter. Trim ends of cake. Refrigerate 1 hour or until ready to serve. Sprinkle cake with additional confectioners' sugar just before serving.

Makes 12 servings.

Mary Cokenour
January 2, 2013

Monday, December 31, 2012

Spoil Yourself with Shari's Berries

                                                     Shari's Berries


Website: http://www.berries.com/

For my birthday, December 26th, my hubby spoiled me by sending me a full dozen of Shari's Berries Gourmet Dipped Fancy Strawberries.  I've seen the commercials often and wanted to try them, and now was the time.  They are delivered by UPS truck and come in a styrofoam lined box with freezer pack to keep them fresh.  The box itself is beautiful, but the strawberries win the prize for beauty and taste.

Each strawberry was large, red, ripe and delicious.  After biting into one, the juice would dribble down the chin, so have your hand ready to catch it all and yes, you will want to lick it clean.  The chocolate covering is thick, yet delicate, so be ready to catch any pieces that fall.

Besides the strawberries, Shari's website offers chocolate covered cherries and pretzels; cheesecake and cookies (with or without a chocolate coating).  They even have Zoo Animal Cake Pops to light up any child's eyes and taste buds.

Shari's Berries offers specials for every occasion and holiday.  There is a rose bouquet of chocolate covered strawberries that would win any woman's heart on Valentine's Day; or man's if so inclined.  However, something tells me that Roy and I might just be making up any old reason to order from Shari's, and we certainly plan on sampling all the other goodies offered.

Be good to yourself and/or someone special in your life for the New Year of 2013, and order a little something something from Shari's Berries.....you're worth it.

Happy New Year's to All from the Cokenour Family.


Saturday, December 29, 2012

My Holiday Adventure with a Prime Rib.

Enjoying a finely roasted slice of Prime Rib Roast is not something new to me. I have eaten them at many a wedding reception, or on a special occasion at a restaurant. However, I was not brave enough to consider making it on my own; it's an expensive cut of beef, I was so afraid of messing it up or that it would be too difficult. That was then, this is now and I'm a lot braver than I used to be, especially in the kitchen. Since the winter holidays were upon us, what better way to show off my bravery, but then to make a Prime Rib Roast. I shopped around and found lovely specimens of this beef type; one to make for me and my hubby; one for his mother and brother to enjoy. Now the big question was, what do I do with them? To the internet!!!

Into my Google search box I typed, "how to roast a prime rib?" and thousands and thousands of sites popped up; I stuck to the first 10 on the first page.  I could not believe I actually found a forum set up for discussing prime rib and almost each person had their own way of doing it.  Of course each person also stated that their way was the perfect way, and no other method could compare.  In an hour I had come up with my own cooking and seasoning methods.  How you ask?  I used averages and majority rule; I averaged out the cooking temperatures and times; figured out which seasonings people used the most and threw in my own touches to make it all mine.  Ok, here comes the bragging.....out of all the prime rib dinners I have eaten in my lifetime; mine is the absolute best I've ever had.  There, I've said it and will say it again; my prime rib is the absolute best!!!

So lets get to the perfection...

 
How to Make a Prime Rib Roast
 
 
Normally a prime rib roast comes with the bones attached.  You can do several things with the bones once removed; use them as a rack for the roast to rest on while roasting; cook them separately to eat later on; use them to make beef stock.  Or you can ask your butcher to remove them for you and not deal with them at all; to me, that's a complete waste.  Prime rib usually comes with a thick fat cap also; I removed a good portion of it so I could get the seasoning rub onto the meat itself, but left enough fat so the meat could self baste while roasting.

Ingredients:
 
1 (14.5 oz) can beef broth
1/2 can of water
4 large shallots, peeled and split into sections
2 tsp dried rosemary
3 tsp dried thyme
1 tsp garlic powder
1 tsp onion powder
1/2 tsp ground black pepper
1 tsp coarse sea salt
2 Tbsp olive oil
8 lb prime rib; bones removed

Preparation:


Preheat oven to 400F.  Line a roasting pan with aluminum foil; pour the beef broth and water in.  Place the shallot sections in the pan so that the prime rib will be located over them.  Spray the rack with nonstick spray and place into the pan; be careful not to tear the foil.


Mix together the rosemary, thyme, garlic and onion powders, black pepper and salt.


Brush olive oil over top of the prime rib; spread seasoning rub onto it.


Place the roast onto the center of the rack; make sure it it over the shallots.  Roast the beef for 45 minutes at the 400F temperature; turn the temperature down to 300F and roast to desired doneness.  A meat thermometer is going to be your best friend with this process as it will tell you the internal temperature and, therefore, how you like your meat cooked.  125F is rare, 135F is medium-rare, 145F is medium and 155F is well; anything over that, in my opinion of course, is shoe leather. In the words of Doctor Who, it's a "wibbley wobbley, timey wimey" process.


Once you have the roast at the desired doneness, pull the entire pan out of the oven and let it all rest for 30 minutes.  This lets the juices from the roast redistribute back throughout itself; then place the roast on a cutting board and cut one inch slices.


You're probably wondering about the beef broth, water and shallots?  This is what you'll use to make either an au jus or a gravy; first remove the shallots with a slotted spoon.  Then pour all the remaining liquids and solids into a freezer safe plastic bowl; put the bowl into the freezer for 45 minutes; the fat will rise to the surface, solidify and you can just remove it easily with a spoon.  Pour the fat free liquid through a strainer to remove any bits of missed solid fat or herbs.  That will give you a lovely clear, herbal flavored au jus; or you can put the liquid into a saucepan, add a tablespoon of corn starch, bring it to a boil and make a gravy.  The shallots?  I chopped them up finely and added them to the au jus, but they could just as well be served on the side of the prime rib slice.

Now what did I do with those rib bones?  Glad you asked. 


I seasoned them up a bit differently by using my all purpose seasoning rub .  After the prime rib was done, I popped them into the 300F oven, sitting on an aluminum foil covered rack in a pan; I let them roast for 3 hours.


They made a good snack for my hubby later on.


In essence, fear is the appetite killer; take the plunge and make something that you thought could only be found at a good restaurant or a banquet hall.  New Year's Day is just around the corner, so make the resolution to treat yourself well and keep it.

Happy Holidays!!!

Mary Cokenour

Sunday, May 6, 2012

Got Spaghetti? Make Potpie!

Yes, you read the title correctly; I'm going to tell you how to make potpie with spaghetti. Now I know you're thinking, "how do you make a traditional potpie with spaghetti as a topping? Hint: the spaghetti is not a topping, but a main ingredient. Curious?

Well it all began when I was reading some recipes at an online recipe site and saw "Spaghetti Alfredo". Curious, I checked out the ingredient list and preparation. Basically it was cooked spaghetti mixed with cream of mushroom soup, milk, chopped broccoli and topped with sharp cheddar cheese. My thought was, "Alfredo?" I was not getting the picture, especially with the sharp cheddar cheese.

Now I needed to make dinner and thought (yeah, I do a lot of that) that it was time to be adventurous once again and play with my food. I make an awesome chicken pot pie, but didn't want to deal with a pie crust or biscuits. Remembering the recipe I just mentioned, the lightbulb flashed on, why not use potpie ingredients, but mix it in with spaghetti? The result? Not only was it a quick meal to put together, but the scent made me salivate, and the taste was just oh so good!

So here you go, "Spaghetti Potpie Casserole". Now doesn't that look num yummy?  Needing a recipe for a get-together; consider this one next time and prepare to be praised.


Spaghetti Potpie Casserole

Ingredients:

2 Tbsp butter, divided in half
½ cup each diced red onion and red bell pepper
1 lb cooked spaghetti, kept warm
3 cups chopped, cooked chicken breast
1 cup fresh or thawed frozen peas
1 cup parboiled, diced carrots
1 can (10.5 oz) each cream of celery and cream of chicken soup
1 cup milk
1 Tbsp each crushed, dried thyme and parsley
1 tsp ground black pepper
1 cup finely shredded Mexican blend cheese

Preparation:


In a 10” skillet, medium heat, melt one tablespoon butter; add onion and bell pepper; sweat till softened, about 3 minutes; do not let vegetables brown or burn.

Preheat oven to 350F; smear bottom and sides of a 3 qt. casserole dish with other tablespoon of butter.

In a large bowl, thoroughly mix softened onion and bell pepper together with all ingredients, except the cheese. Spread evenly into casserole dish and top with cheese. Bake for 20-25 minutes; until cheese is completely melted, but do not let brown.

Makes 8 servings.

Mary Cokenour

Sunday, January 15, 2012

Happy Blogaversary to Food Adventures of a Comfort Cook


One year ago today, the movie "Julie and Julia" inspired me to create this food blog.  Funny to think how often I had had the desire to write a cookbook, but no publisher would consider my work as deserving.  Yet, with this blog, I have done exactly that, written a cookbook online and through a popular media format...the blog.  Within my "cookbook" I have shared many a recipe from my life and explored new cuisines to share with my readers.  The year itself, as with any life, was full of ups and downs, happiness and sadness, gains and losses; there are no regrets and happy memories overshadow any negativity which tried to invade my life.

I increased my own culinary knowledge and potential by adding restaurant and product reviews to my lineup of posts.  While many enjoyed, and found helpful, these reviews, I found that many a coward tried to bash me with anonymous comments.  These cowards, of course, caused me much laughter at their sheer stupidity, so I must thank them for their lack of manners and intelligence.

Another adventure I started a journey on was the world of baking.  I must admit that I have not ever truly enjoyed baking due to the strictness of measuring and preciseness required.  However, by daring to learn I have acquired a new talent.

All in all, I have loved this journey, this series of culinary adventures.  I must however give thanks to those who were my guinea pigs, the many people who were often called upon to try my experiments and were required to give critiques.  I give thanks to all those people who have been reading my blog and hope that they will eventually join the rank of "Follower".  I especially thank my husband Roy who has had to taste, eat and critique every recipe; who has had to duck and cover when complete chaos erupted in the kitchen.  I love you dear and my life is totally complete with you in it.

To celebrate this day, a fine feast was prepared of roast chicken, cornbread stuffing and a steamed vegetable medley; simple and oh so comforting.  I hope you will make it yourself and join in the celebration of "Food Adventures with a Comfort Cook".  Thank you and Bon Appetit'!!!


Roast Chicken with Corn Bread Stuffing

Ingredients:


1 (5 lb) chicken
1 Tbsp butter
¼ cup each diced onion, celery and carrots
¼ tsp ground black pepper
2 Tbsp fresh minced parsley
2 ½ cups coarsely crumbled corn bread
1 (14.5 oz) can chicken broth, divided in half
¼ cup olive oil
1 tsp each coarse sea salt, ground black pepper, onion and garlic powders; mix together
2 cups water
1 Tbsp flour

Preparation:

Preheat oven to 350F. Spray roasting pan and rack with nonstick cooking spray.

Wash chicken with cold water and make sure to remove any organs stuffed inside; discard or use for gravy making. Tuck wings over neck opening and skewer skin flap over to close opening and keep wings from over browning; set chicken aside.

In a small skillet, medium-low heat, melt butter and sauté onion, celery and carrots until softened; mix in ¼ teaspoon pepper and the parsley. While vegetables are sautéing, combine corn bread and half can of chicken broth in large bowl; add in softened vegetables and mix thoroughly. Stuff chicken with corn bread mixture and seal opening with skewer; tie legs together with butcher twine. Rub olive oil over all of the chicken and sprinkle seasoning combination all over; place chicken on pan rack (breasts side up). Pour remaining broth and water into roasting pan; place pan in oven and roast chicken for 2 ½ to 3 hours, or until internal temperature reaches 165F and juices run clear.

Remove chicken to platter to rest; pour drippings from pan into small saucepan, set on high heat; whisk in flour and bring to boil. Carve chicken and serve with gravy.

Serves 4-6.

Mary Cokenour

Saturday, January 15, 2011

...and so the adventure into blogging begins.

Yesterday, I finally saw a movie, "Julie and Julia", that I've been wanting to see for a long while.  I was impressed by the story itself, the characters, and it moved me to start a blog of my own.  I've never kept a diary, didn't really see a point to it.  My life was not the happiest as I grew up, so why would I want to read about it, and relive those heartbreaking days.  Unfortunately, I have a minor type of autobiographical memory, and all the traumas from childhood into adulthood keep bursting in on my mind, whether I wanted them to or not.

So, with this blog, I'm hoping to recreate memories that mean more to me than those lousy ones.  Maybe I'll finally be able to suppress those bad memories to the point that they will stop inflicting themselves upon me.  Above all else, I believe that my life with my husband, Roy, will be the biggest inspiration overall.  He has been my rock, my soulmate, my everything, since we first met in December of 2003.  Before then, we had been conversing via email, IMs and on the phone since September 2003.  We met on a Dungeons and Dragons gaming site, found we had much in common, besides roleplaying, and just kept getting closer and closer till we finally had to meet. 

Roy arrived in Pennsylvania, where I was living then, at the bus station in Harrisburg.  At first sight, we hugged, and hugged, and hugged, and we didn't want to let go.  We had discovered that we had a deep empathy between us, and knew this was it...this first physical meeting was the beginning of forever for us.

Throughout the years, we have supported each other in all ways...spiritually, emotionally, mentally, physically, financially.  Together we made life one big adventure for us.  After we were both laid off in 2008, we made the decision to sell the house I owned, and move to Utah.  Originally we had hoped to buy a home in Moab, but the prices were ridiculous for the real estate market at the time.  We ended up with a fixer-upper in Monticello, and while it wasn't our dream home, we made it our own in so many ways. 

We'd been together since 2003, and finally decided to tie the knot in 2010, so on October 8th, we legally became husband and wife.  Surprisingly, we didn't feel different at all.  We'd always considered that we were married to each other, conducted ourselves as a married couple; friends even stated that we were more married to each other than any married couple they knew.  Guess you could say we did it just to make the lovers of legal documents and red tape happy.  We loved, and were in love with, each other, and didn't care what anyone else thought about our arrangement.  But being legally married sure did make getting insurance easier.

So, where will I be going with this blog, no idea, and I'm just looking at it as a new adventure.